Vultr
Vultr is a US-based company that has a great reputation for performance and value. They have a wide range of data centers around the world and a great API for automation.
Create an account
The first step is to create an account with Vultr. You can do this by going to their website and clicking the "Sign Up" button. With the link below, they offer $100 in credits. This is an affiliate link, meaning we get a small kickback if you sign up, but this doesn't affect our recommendations.
Create an API token
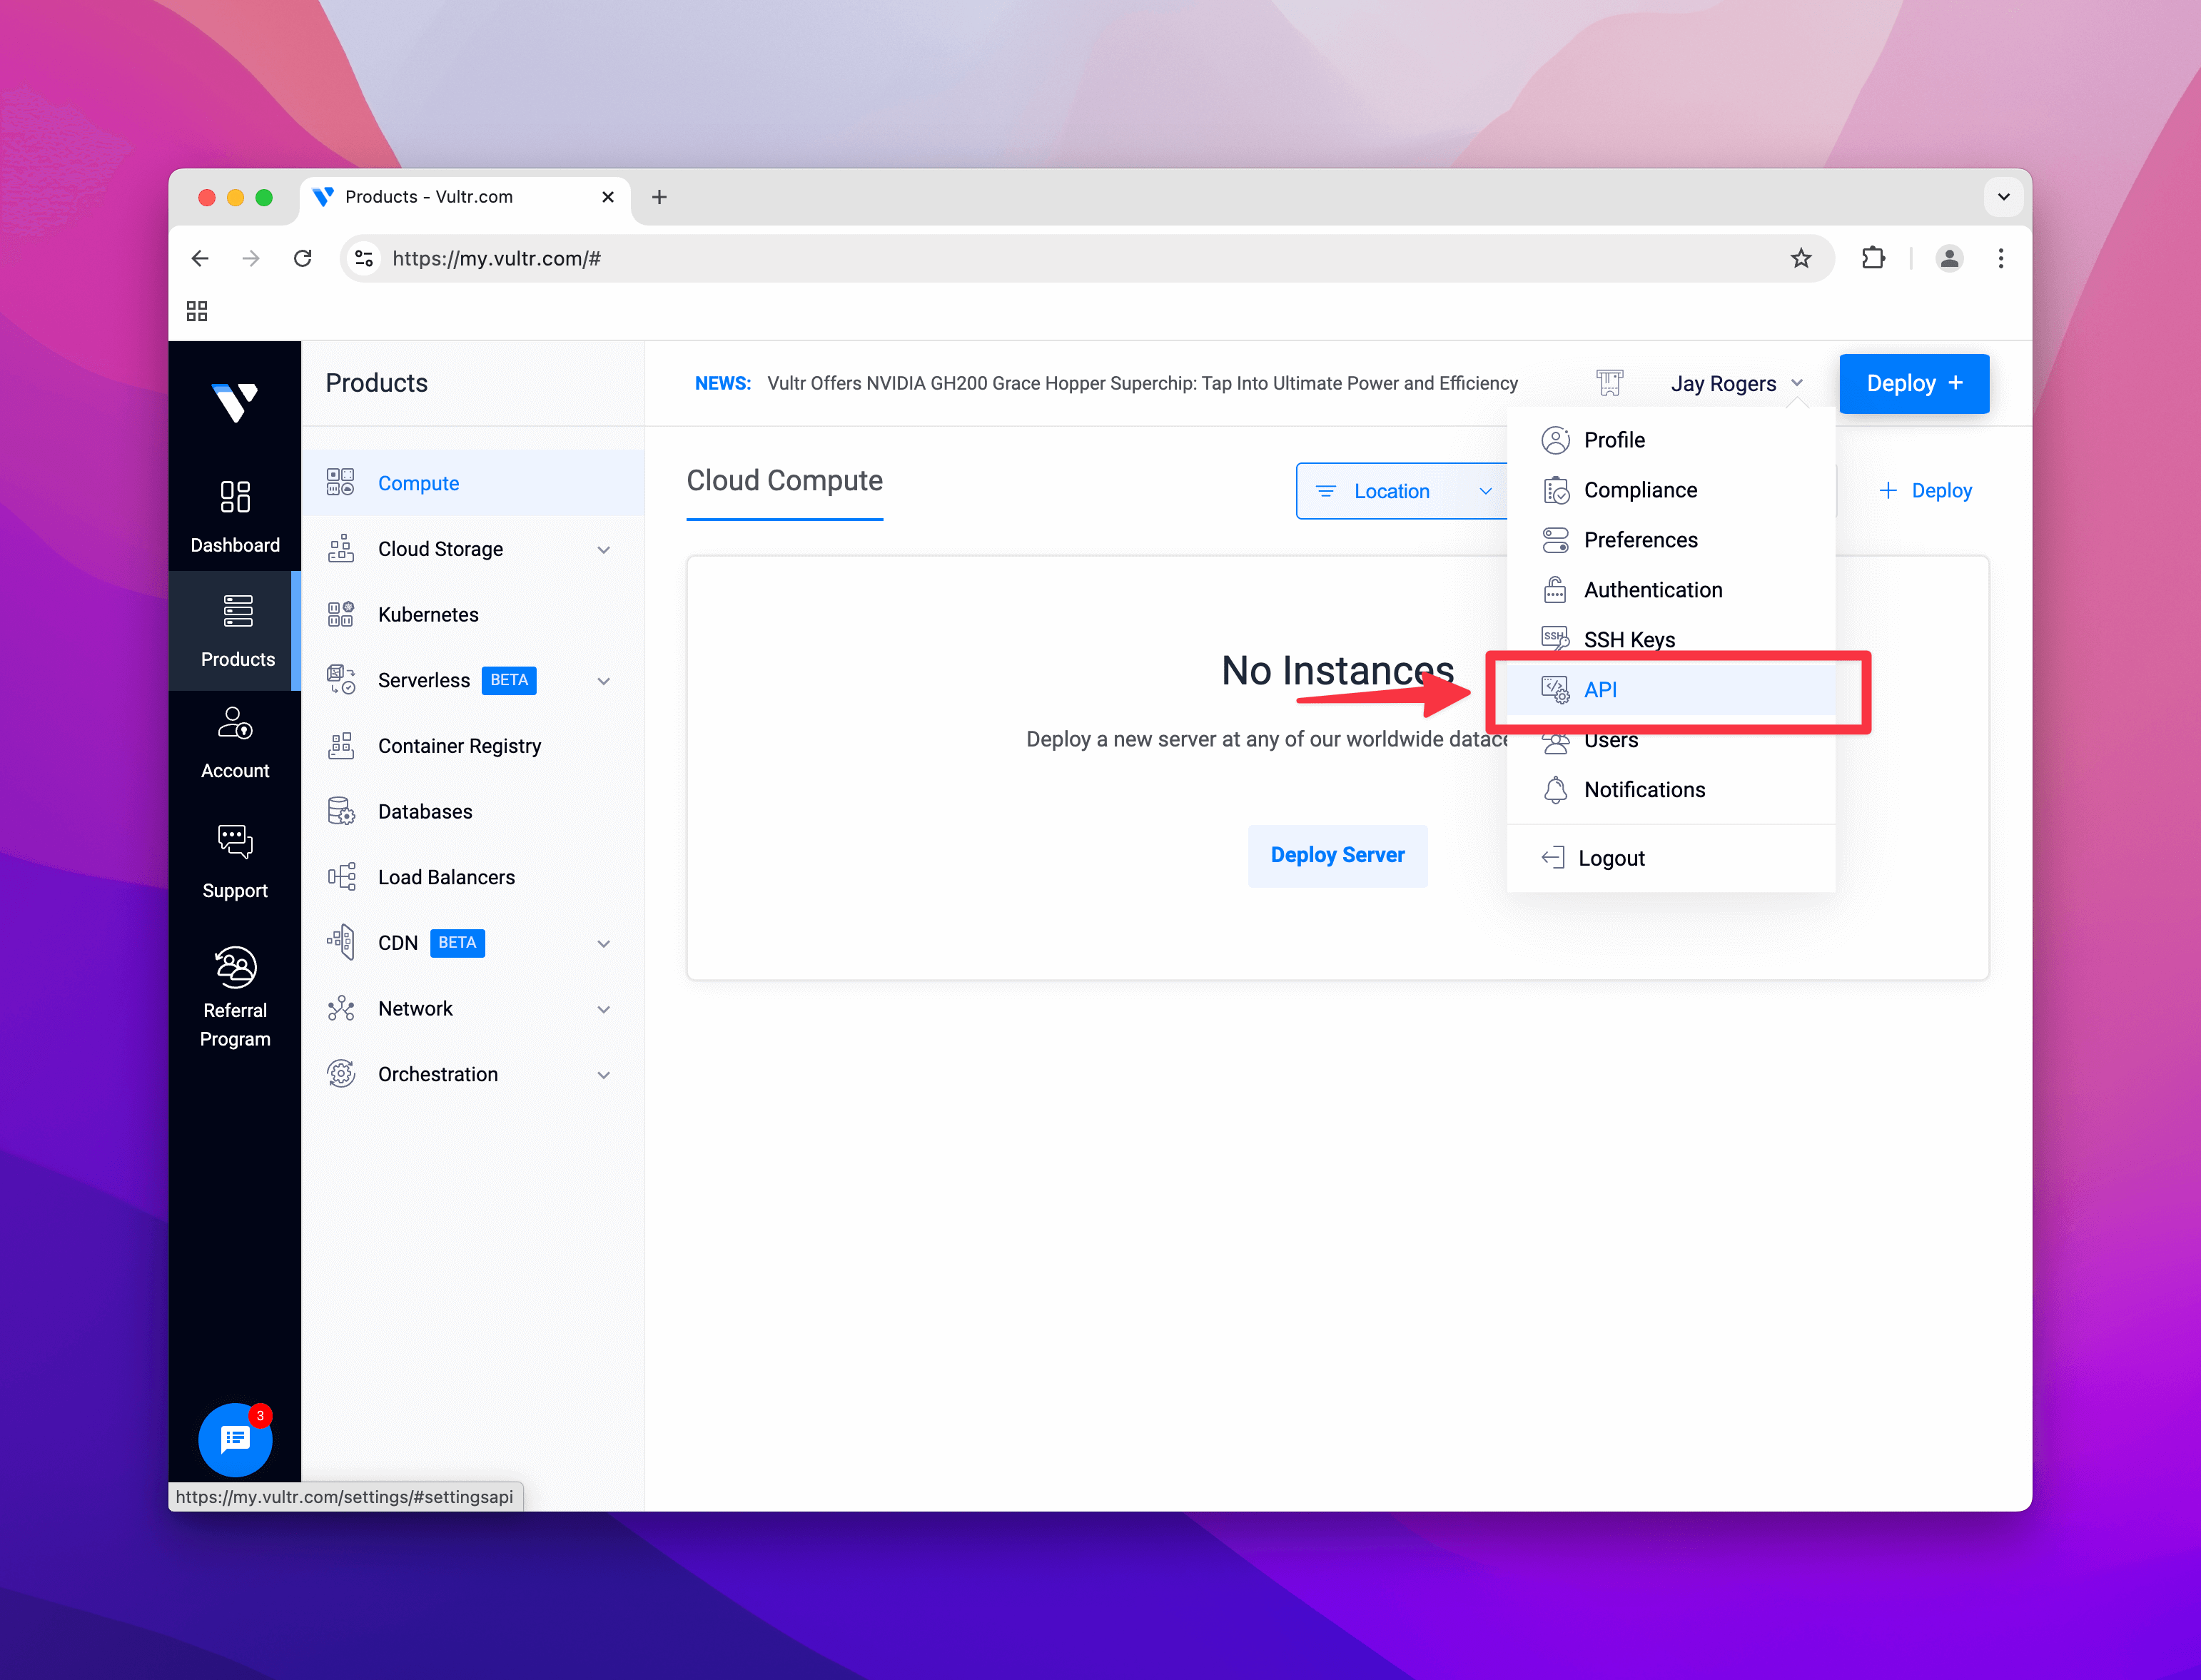
To create an API token, you'll need to sign in to the Vultr Console. Click on your name in the upper right, then click "API".

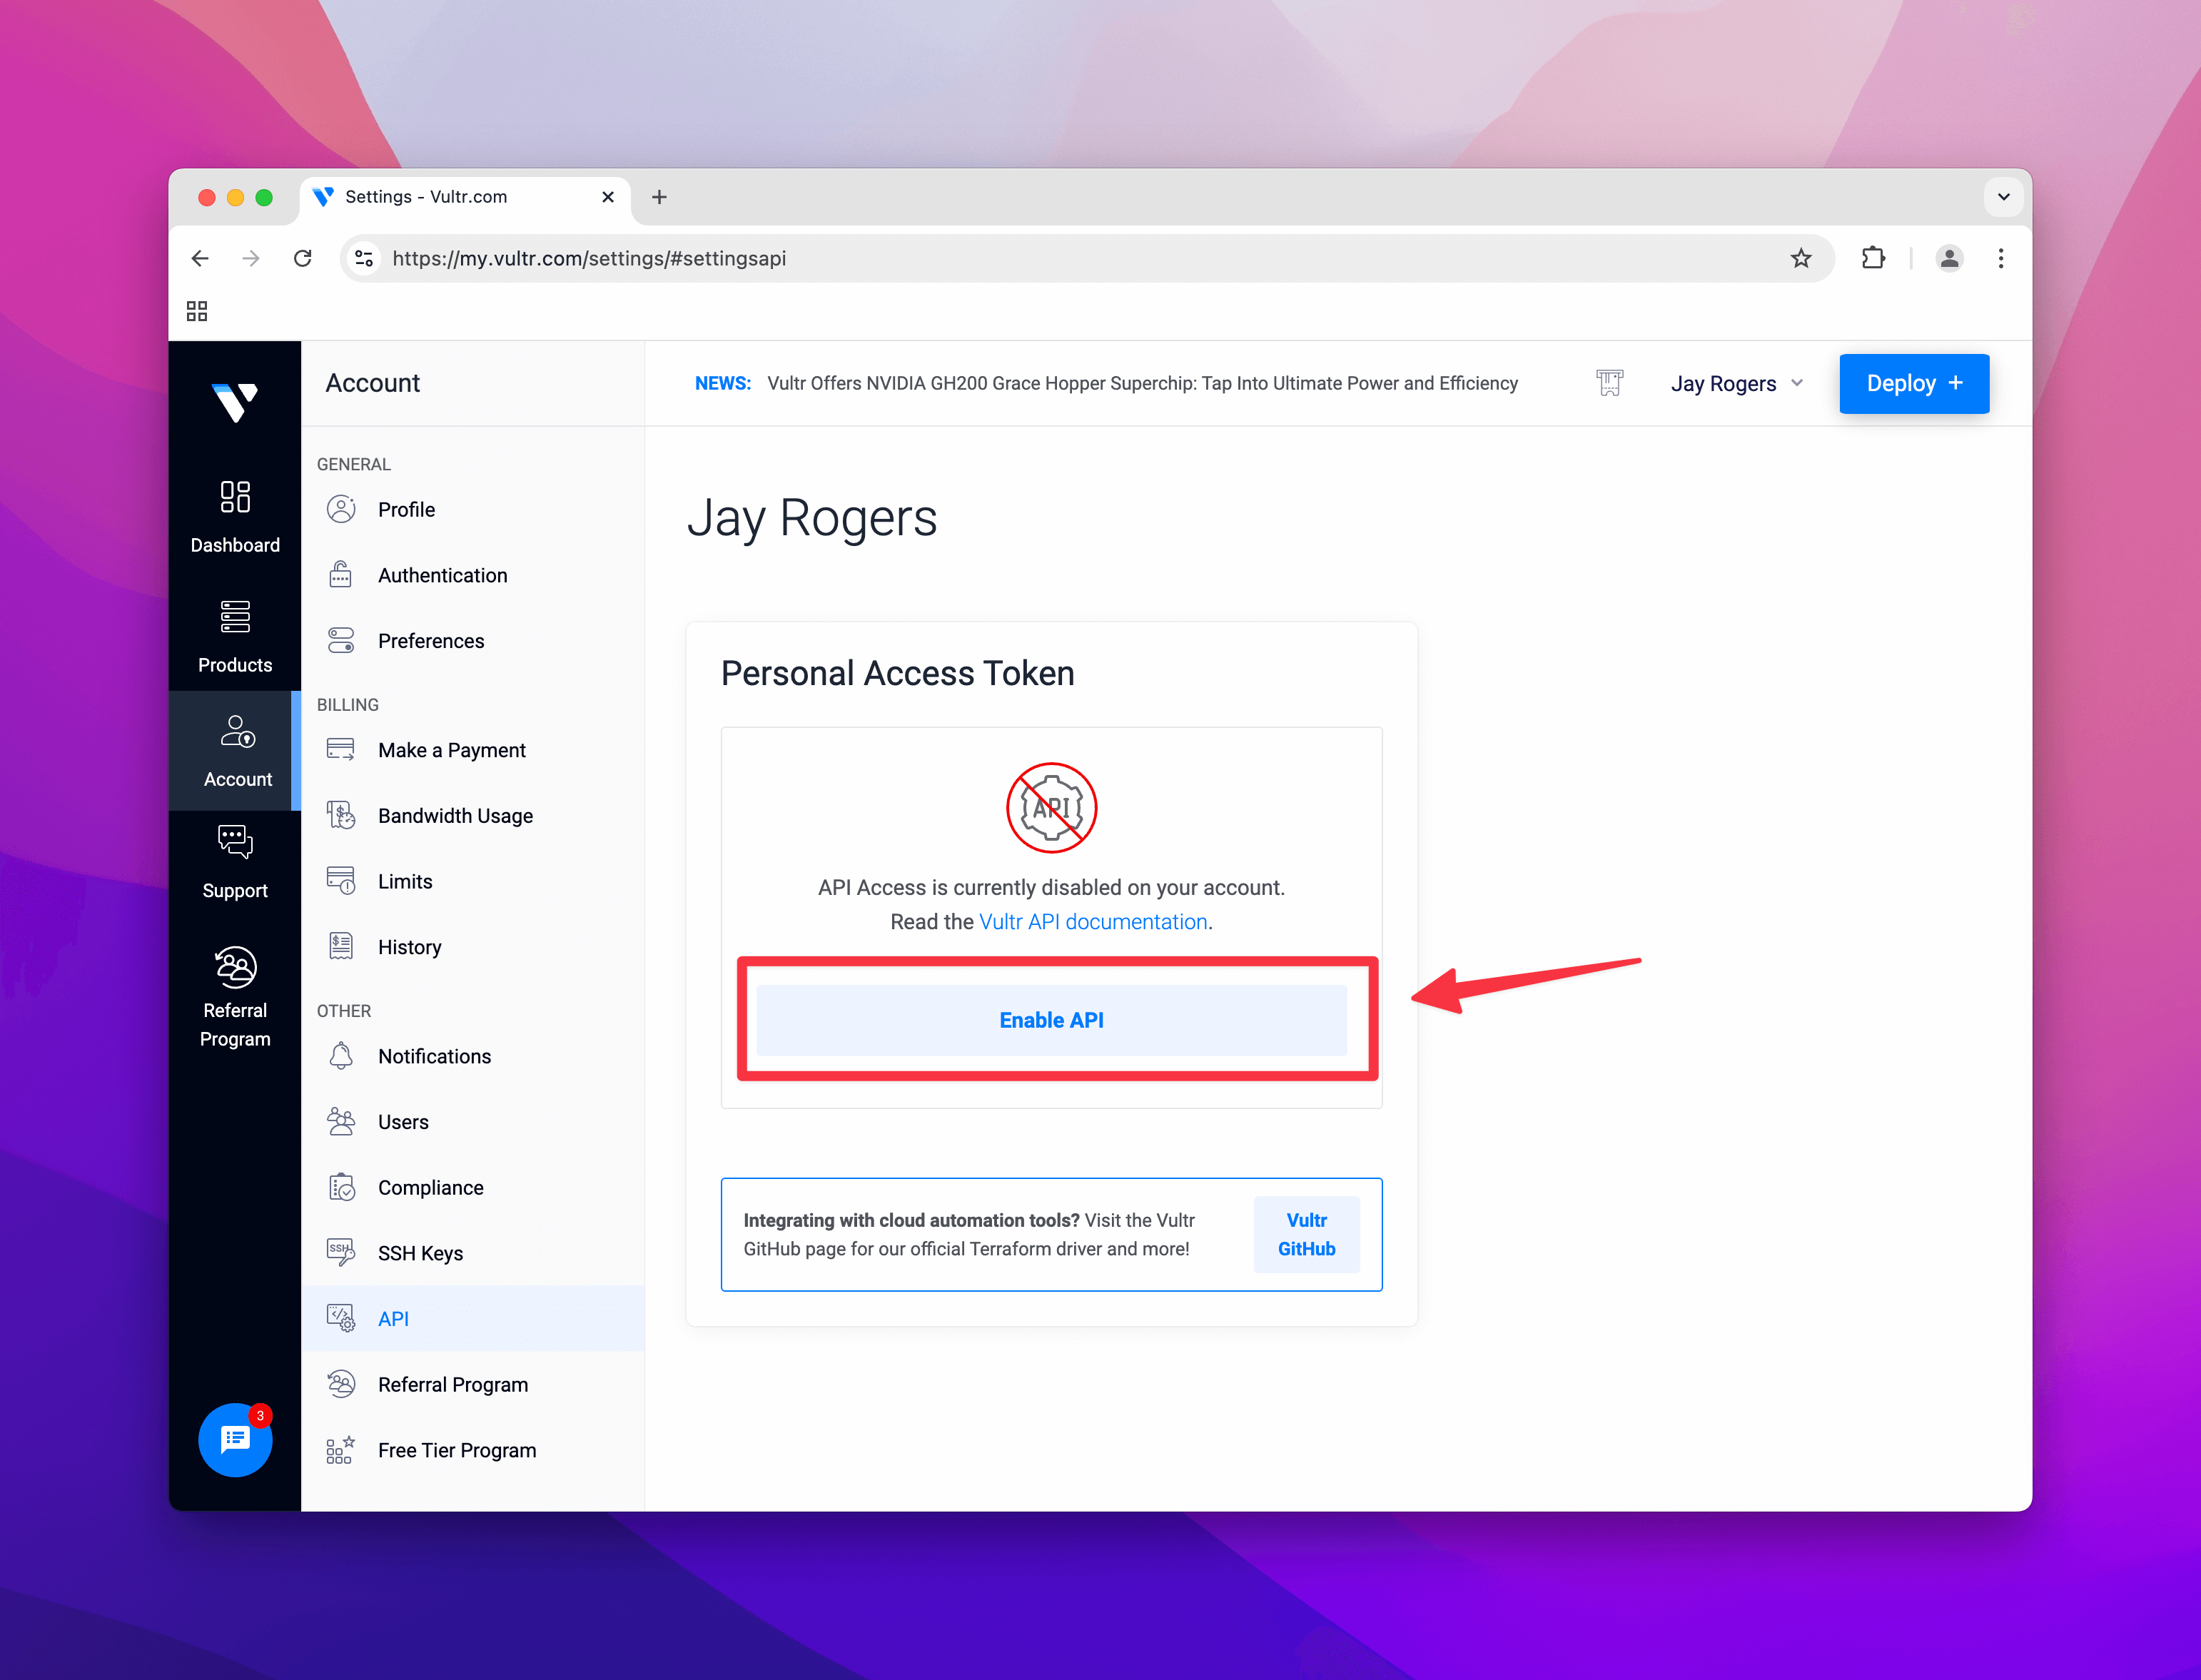
On the API page, click the "Enable API" button.

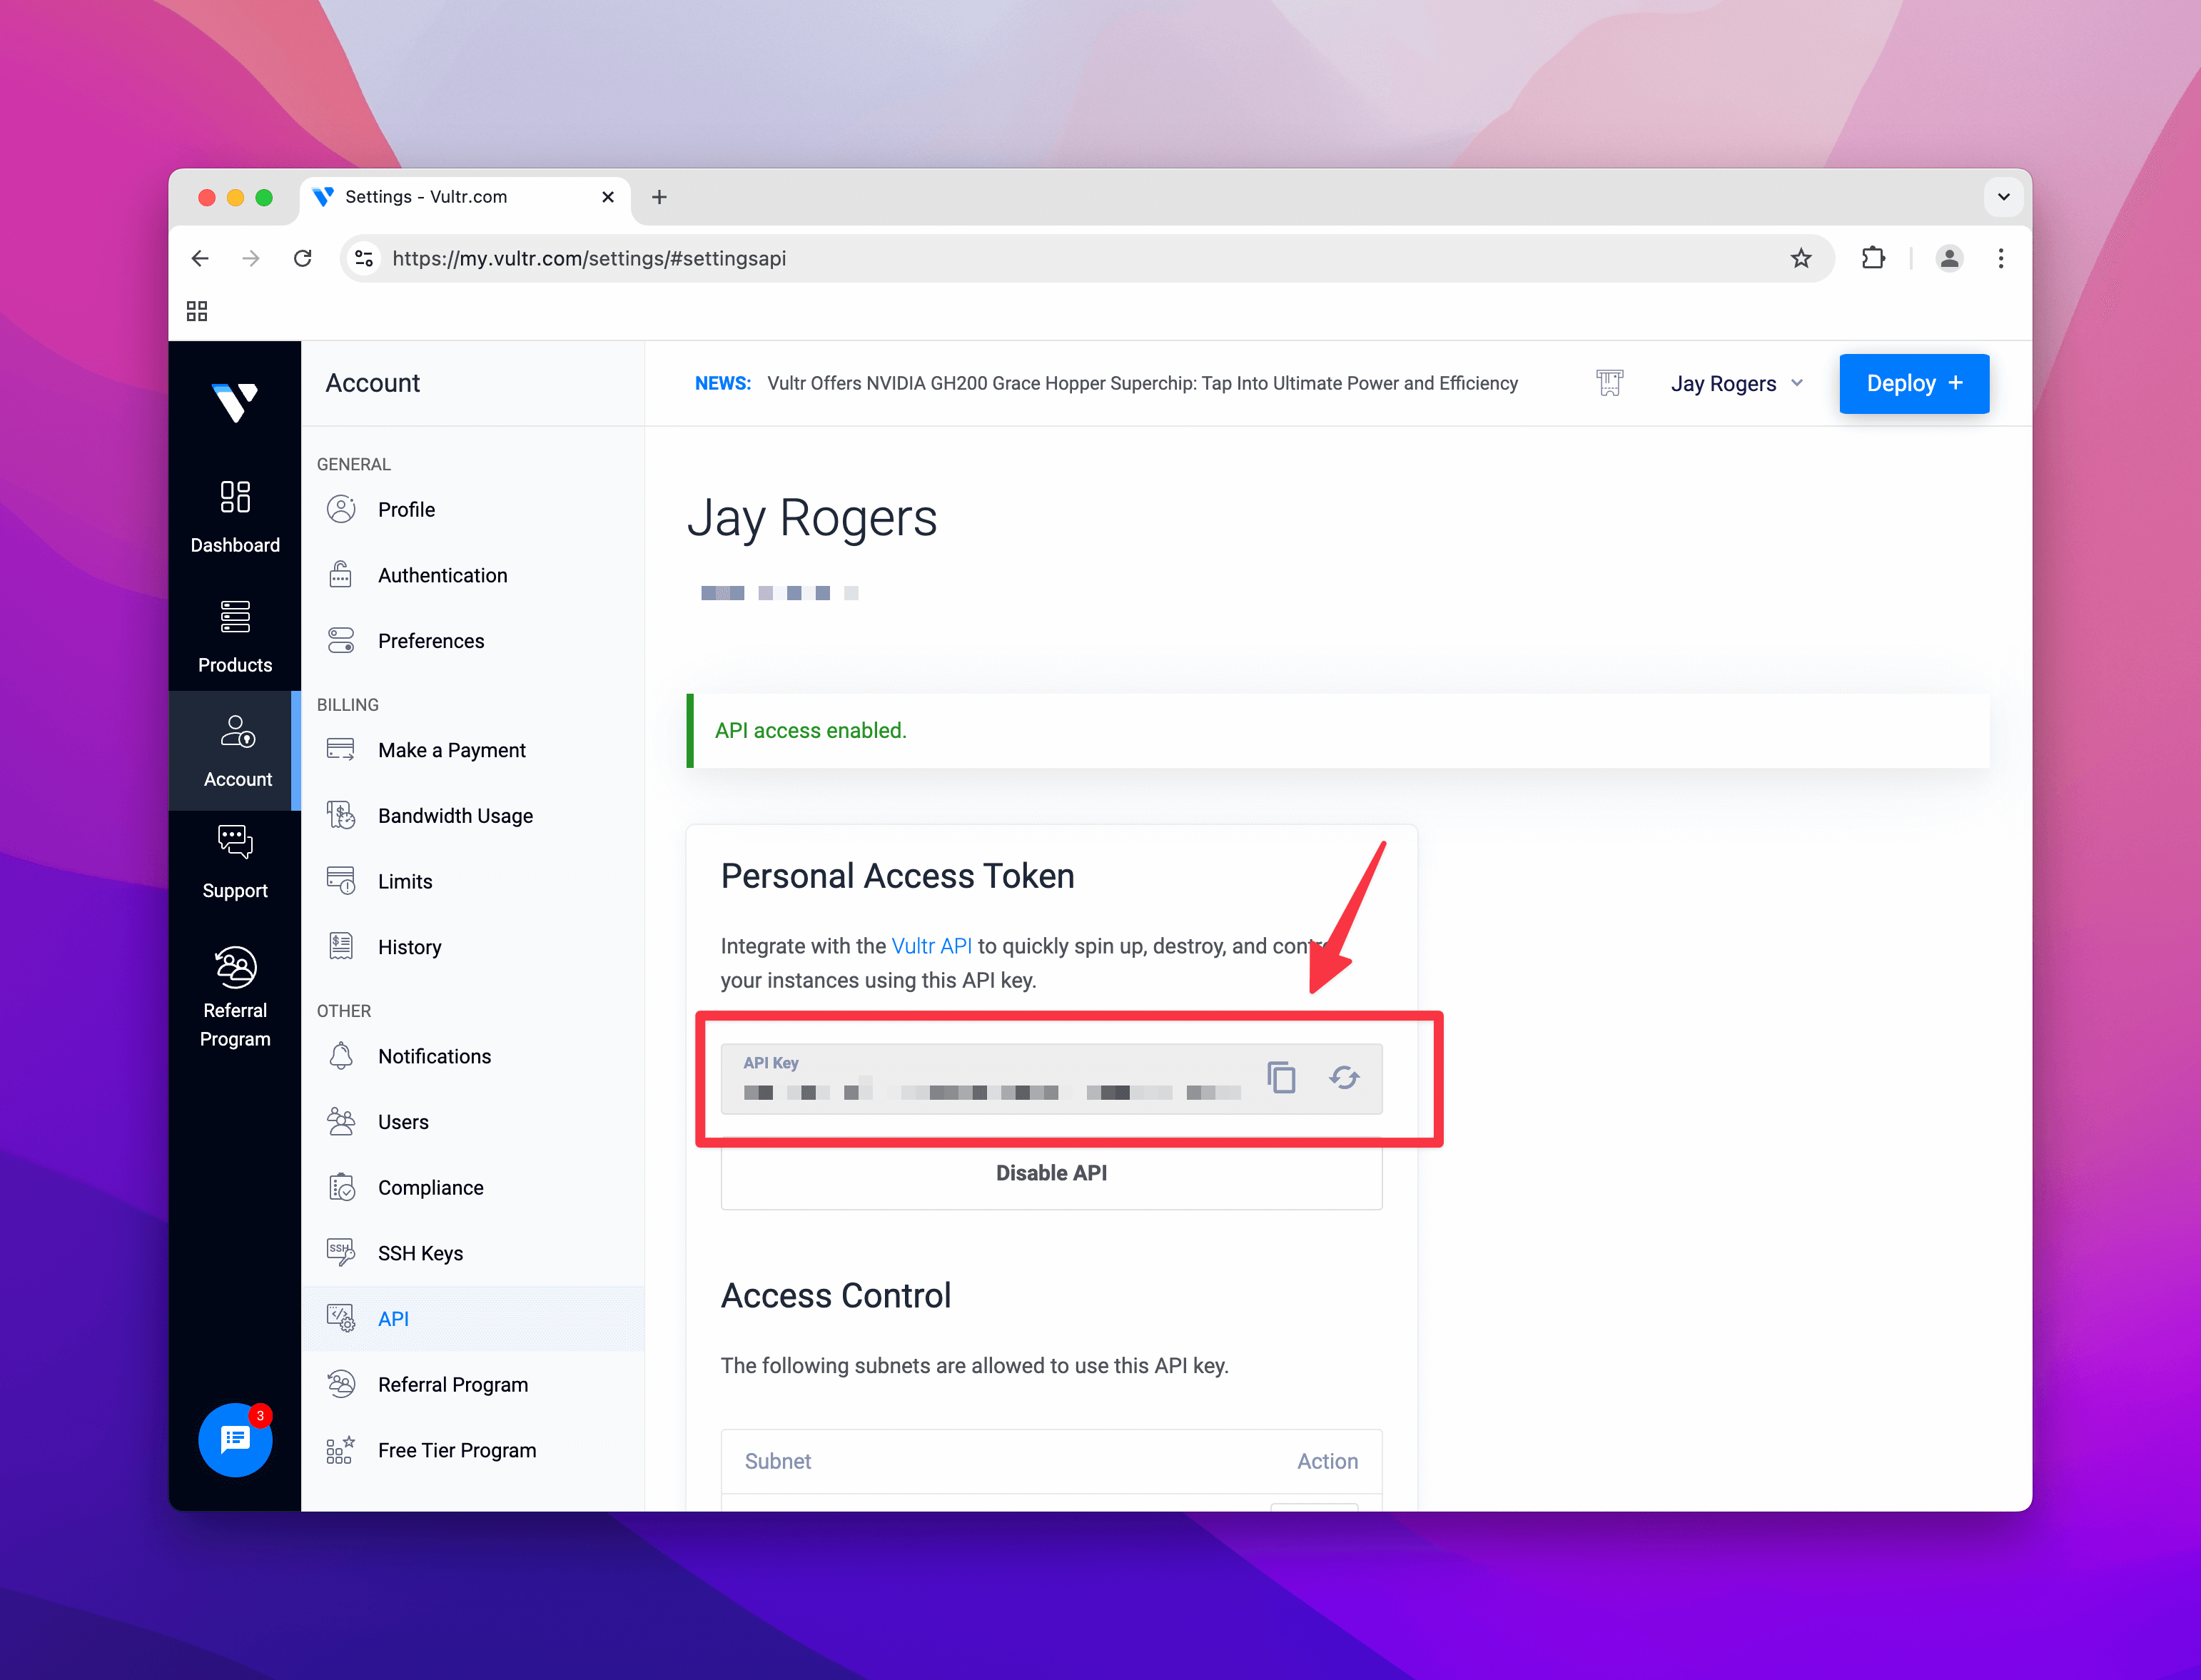
You'll see your API token on the page. Press the "Copy" button to copy the token to your clipboard.

Place the token in your .spin.yml file
In your .spin.yml file, you'll find a providers section where you can add your Vultr API token.
##############################################################
# 👇 Providers - You must set at least one provider
##############################################################

providers:
  - name: vultr
    api_token: abc123def456ghi789jkl012mno345pqr678stu901vwx234yz
Set as VULTR_API_KEY environment variable
If you prefer to set the token as an environment variable, you can also set the VULTR_API_KEY variable in your .env file, secrets manager, or wherever you store your environment variables.
Configure users
Make sure you configure your system users in your .spin.yml file.
##############################################################
# 👇 Users - You must set at least one user
##############################################################

users:
  - username: alice
    name: Alice Smith
    groups: ['sudo']
    authorized_keys:
      - public_key: "ssh-ed25519 AAAAC3NzaC1lmyfakeublickeyMVIzwQXBzxxD9b8Erd1FKVvu alice"
Configuring a Vultr hardware profile
By default we set you up with a very cost-effective hardware profile to get up and running quickly.
##############################################################
# 🤖 Hardware Profiles
##############################################################

hardware_profiles:
  # Vultr
  - name: vultr_1c_1gb_ubuntu2404
    provider: vultr
    profile_config:
      region: ord
      plan: vc2-1c-1gb
      os: "Ubuntu 24.04 LTS x64"
      backups: true
You can uncomment the defaults we give you or create/modify your own hardware profile.
| Profile Config | Description | API Reference |
|---|---|---|
region | The data center and location you want to deploy your server to (pick the closest one to your customers). | See below for common examples. |
plan | The type of server. | See below for common examples. |
os | The image to use for the server. | Vultr Images |
backups | Whether to enable snapshot backups for the server (may add 20% to the monthly price). | Learn more about Vultr snapshot backups. |
Common Region Values
The region value is the id of the region. You can find the full list of regions using the Vultr API.
| Location | Country | Value |
|---|---|---|
| Amsterdam | Netherlands | ams |
| Atlanta | USA | atl |
| Bangalore | India | blr |
| Chicago | USA | ord |
| Dallas | USA | dfw |
| Frankfurt | Germany | fra |
| London | UK | lhr |
| Los Angeles | USA | lax |
| Mumbai | India | bom |
| New Jersey | USA | ewr |
| Paris | France | cdg |
| Seoul | South Korea | icn |
| Singapore | Singapore | sgp |
| Sydney | Australia | syd |
| Tokyo | Japan | nrt |
| Toronto | Canada | yto |
Common Plan Values
You can find the full list of server types here.
| Server Type | vCPUs | RAM | Storage | Traffic | Monthly Price (USD) | Description |
|---|---|---|---|---|---|---|
| Regular Performance | ||||||
vc2-1c-1gb | 1 | 1GB | 25GB | 1TB | $5.00 | Basic SSD |
vc2-1c-2gb | 1 | 2GB | 55GB | 2TB | $10.00 | Basic SSD |
vc2-2c-4gb | 2 | 4GB | 80GB | 3TB | $20.00 | Basic SSD |
vc2-4c-8gb | 4 | 8GB | 160GB | 4TB | $40.00 | Basic SSD |
| High Performance (AMD/Intel) | ||||||
vhp-1c-1gb | 1 | 1GB | 25GB | 2TB | $6.00 | NVMe SSD |
vhp-1c-2gb | 1 | 2GB | 50GB | 3TB | $12.00 | NVMe SSD |
vhp-2c-4gb | 2 | 4GB | 100GB | 5TB | $24.00 | NVMe SSD |
vhp-4c-8gb | 4 | 8GB | 180GB | 6TB | $48.00 | NVMe SSD |
| CPU Optimized | ||||||
vcp-2c-4gb | 2 | 4GB | 75GB | 5TB | $40.00 | CPU Optimized |
vcp-4c-8gb | 4 | 8GB | 150GB | 6TB | $80.00 | CPU Optimized |
vcp-8c-16gb | 8 | 16GB | 300GB | 7TB | $160.00 | CPU Optimized |
Configure your server
By default, we give you defaults to get up and running quickly, but you might want to make some changes.
Learn more about server configuration →
##############################################################
# 👇 Servers - You must set at least one server
##############################################################

servers:
  - server_name: ubuntu-1gb-ord-2
    environment: production
    hardware_profile: vultr_1c_1gb_ubuntu2404
Provision your server
Once you have everything ready, you can provision your server(s) by running this simple command:
spin provision
This command will create your server(s) with Vultr and configure your server(s) to be ready for deployment. There are many more options available when provisioning your server(s). To learn more see the guide below:
Learn more about "spin provision" →
Getting ready for deployment
Now that you have a server ready, you'll want to learn how to get ready for deployment. Next steps are to choose a deployment strategy.
