Container Basics
Why even care about containers?
If you're new to Docker or containers, you might be wondering why you should containerize your application in the first place. The short answer: containers let you run your application anywhere — from your laptop to any cloud provider — with zero changes.
Key benefits of containerization:
- Consistency - Your app runs the same on Mac, Windows, Linux, and production
- Confidence - Infrastructure as code means easier testing and rollbacks
- Freedom - No vendor lock-in; migrate hosts with minimal effort
- Simplicity - Scaling from 1 to 100 containers is straightforward
There are some important terms to understand when working with containers:
| Term | Definition |
|---|---|
| Container | A running instance of an image. |
| Image | A template for a container to start with (ie. serversideup/php:8.5-frankenphp). |
| Tag | A specific version of an image (ie. 8.5-frankenphp). |
| Registry | A repository of images. This is where users can pull images from to start a container. This can be places like Docker Hub or GitHub Packages. |
| Volume | A directory on your host machine that is mounted into a container. This allows you to share files between your host machine and the container. |
| Port | Ports are virtual numbers organizing network data traffic, directing it to the correct application on a device. If you want to expose traffic to work with http://localhost, you would map port 80 on your host machine to port 8080 on the container. |
| Environment Variable | A variable that is set in the container's environment. This allows you to configure the container's behavior. |
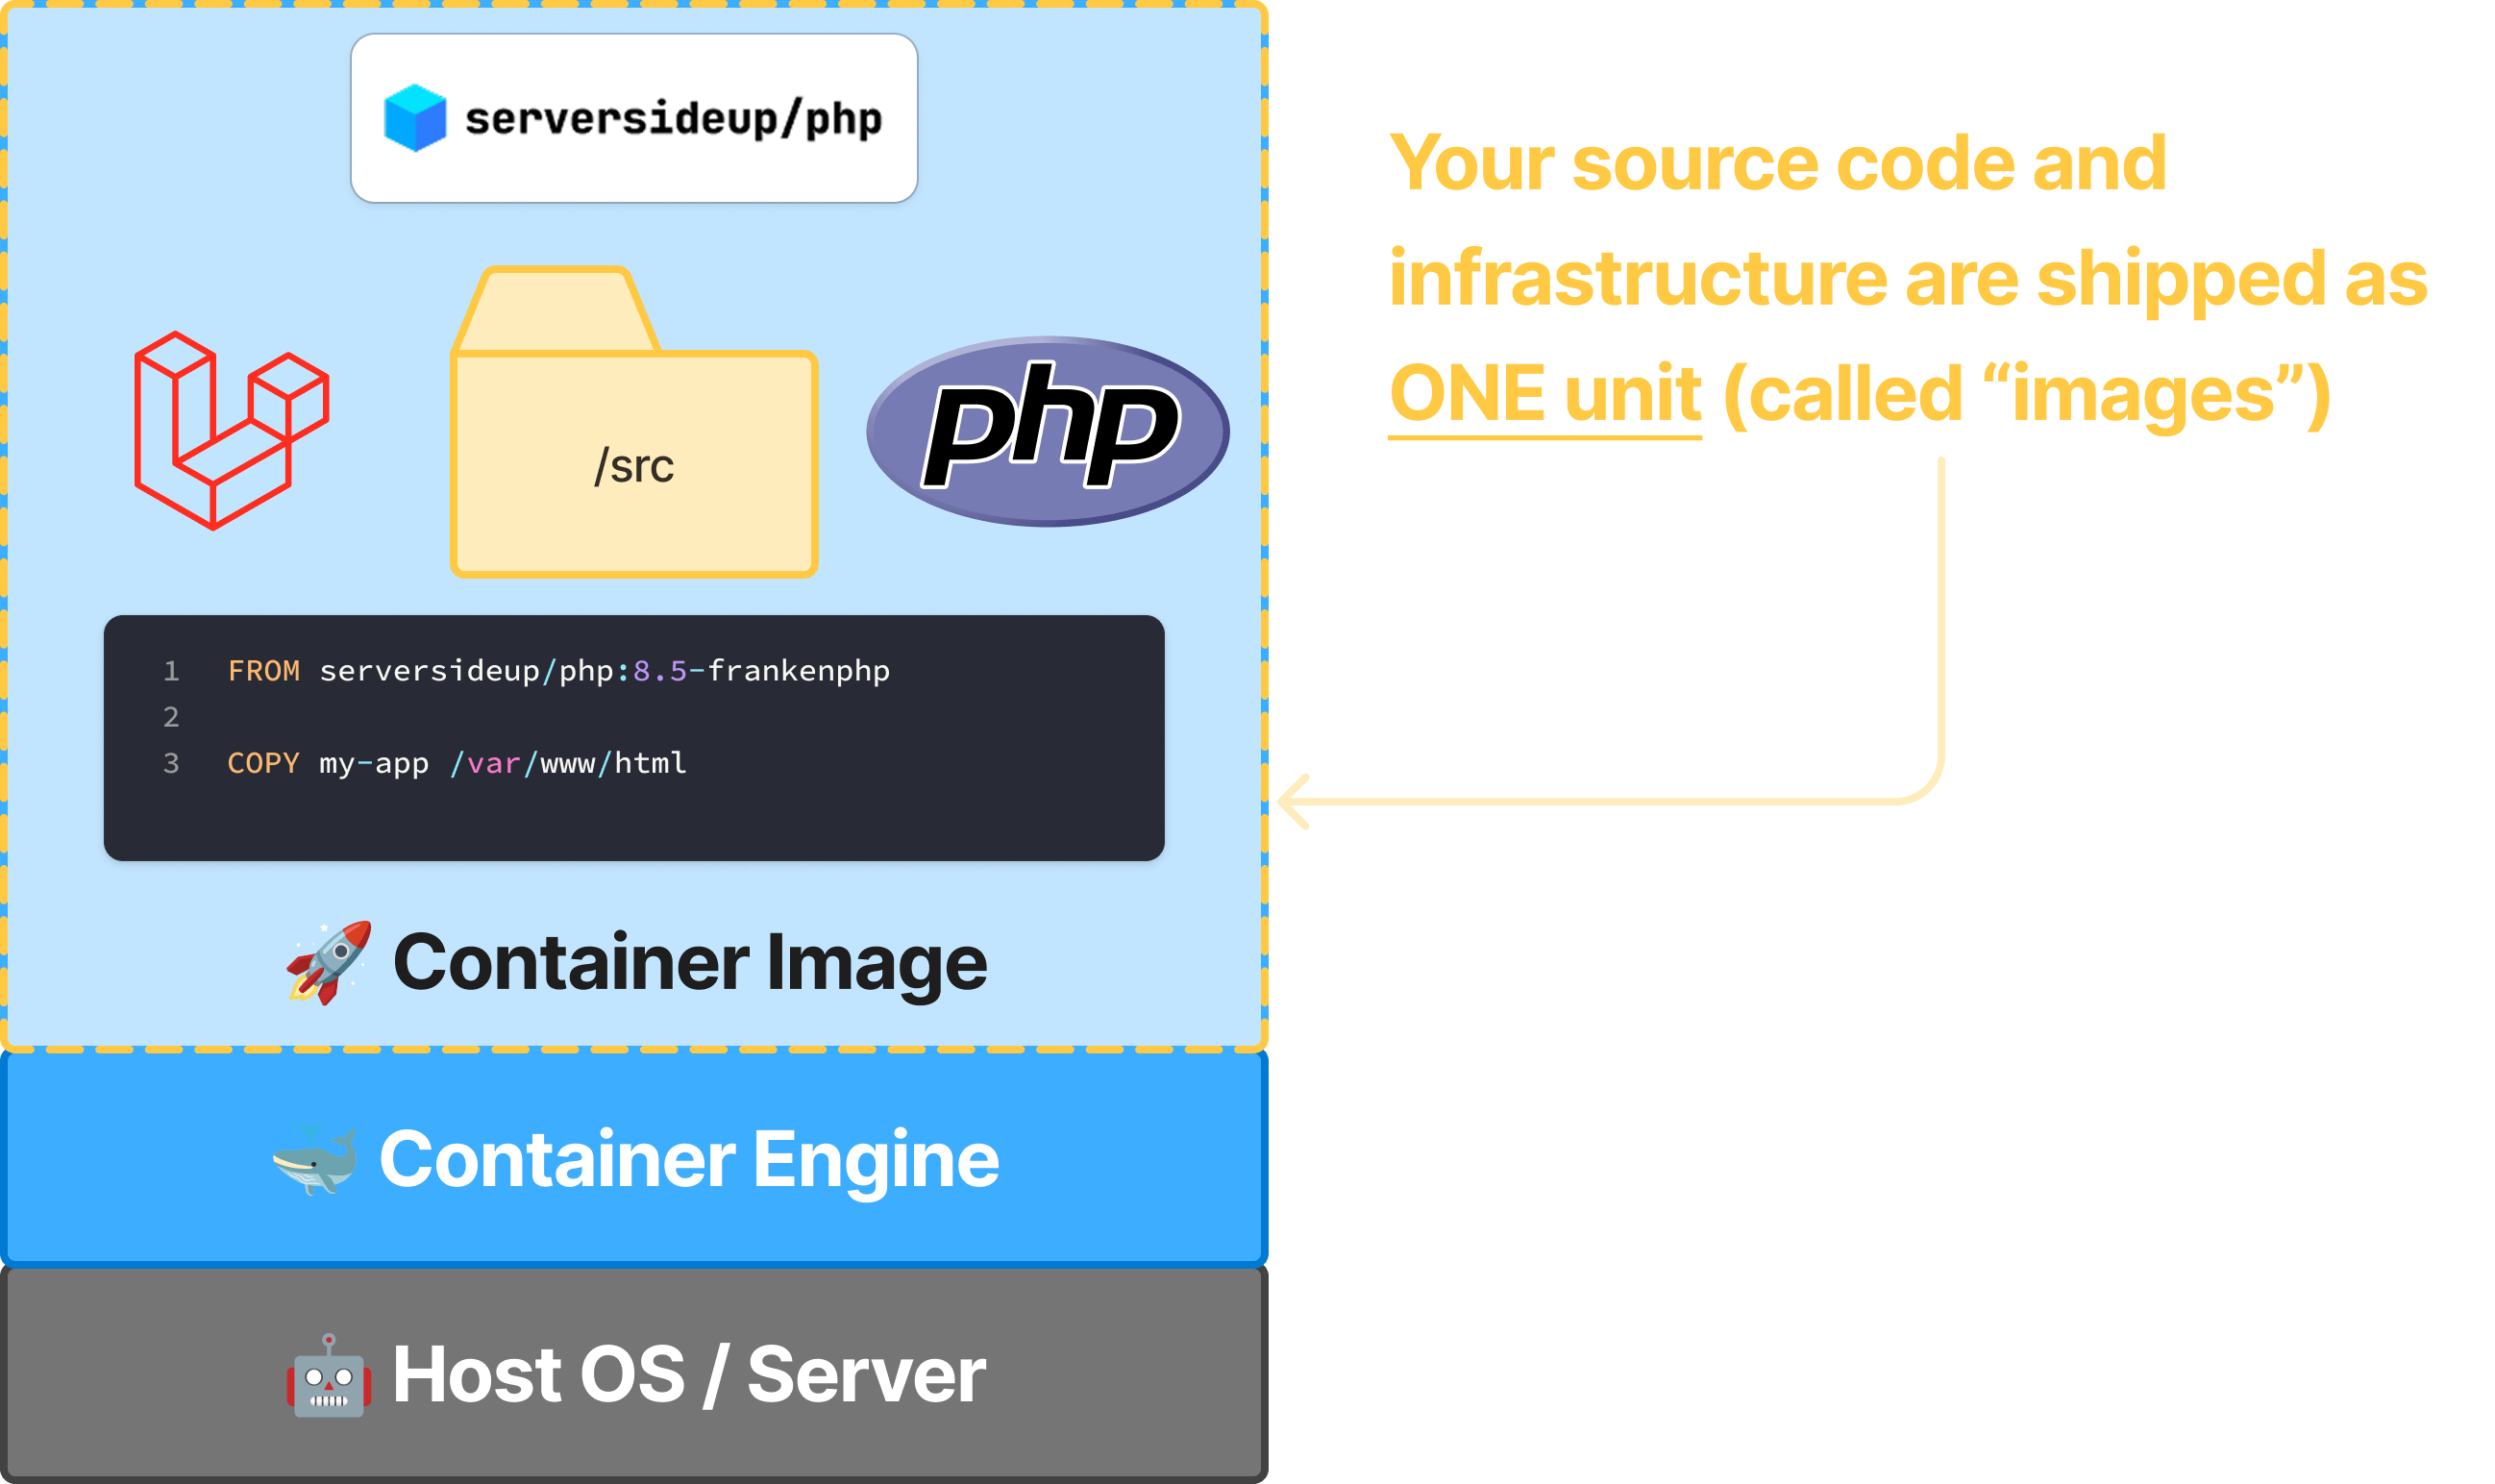
What are containers?
Containers are isolated environments that can run on any host. They are a great way to package your application and all of its dependencies into a single unit that can be easily deployed to any environment.
Why containerize at all?
Going through the efforts of containerizing your application gives you one extremely powerful capability:
👉 You can run your application anywhere.
Once you're at this level, you unlock a ton of new possibilities:
- Your application runs the same across Mac, Windows, and Linux - no more "it works on my machine". Run 100% of your application on any operating system. All they need is Docker installed.
- Ship with more confidence - all infrastructure configurations are centrally managed in Git, so you can change, test and rollback with ease
- No more vendor lock-in - if a host raises their prices on you, you can migrate with very little effort
- Scaling is a breeze - once you get your application in one container, it's so easy to scale up to any number of containers
- Improved security - containerized apps are more secure than traditional apps because they are isolated from the host
- Better uptime - if something fails during deployment, you can roll back your application to a previous version
The crazier part is you don't need a Platform as an expensive Service (PaaS) to get all these benefits. Everything can be done with 100% free and open source tools.
Docker vs. Containers
When you're first learning about containers, you'll likely hear the terms "Docker" and "containers" used interchangeably. While they are related, they are not the same thing. Docker is an open source utility for building, shipping, and running applications in containers. It's one of the most popular tools for containerization.
Although you may see us reference things as "Docker containers", we're actually referring to the broader concept of containers because containers follow a standard known as the OCI (Open Container Initiative). This means Docker containers can run on any container orchestrator that supports the OCI standard (like Kubernetes, Docker Swarm, Docker Compose, HashiCorp Nomad, etc.).
So although we're going to show you best practices with Docker, this means you'll maintain your freedom and flexibility to choose how you want to run your containers.
How containers work
If you followed our installation guide, you've already run containers and seen them in action. Let's break down what actually happened when you ran docker compose up.
Images vs Containers
Think of an image as a blueprint and a container as the actual running instance of that blueprint. When you specified image: serversideup/php:8.5-fpm-nginx in your compose.yml, you told Docker to:
- Download the
serversideup/php:8.5-fpm-nginximage (the blueprint) - Create a container from that image (the running instance)
- Start the container with your specified configuration
You can create multiple containers from the same image — just like you can build multiple houses from the same blueprint. Each container runs independently with its own isolated filesystem and processes.
Understanding image layers
Container images are built in layers, like a stack of pancakes. Each layer adds something new: the operating system, PHP, web servers, and configurations. When you pull an image, Docker downloads only the layers you don't already have, making updates incredibly efficient.
This is why switching from PHP 8.3 to 8.4 in the installation guide was so fast — most of the layers were already on your machine, and Docker only downloaded the differences.
8.3-fpm-nginx and 8.4-frankenphp aren't just version numbers — they describe the entire stack that's included in that image. The tag tells you the PHP version and which variation (web server stack) you're getting.Key concepts
Service names
A service in Docker Compose is a named container definition. Think of it as a label for a specific part of your application — like your web server, database, or cache. Each service runs in its own container and can be managed independently.
In your compose.yml, when you define a service called php, you're telling Docker Compose "this is my PHP application server." You can name it anything you want — we use php to keep it simple, but web, app, or backend would work just as well.
services:
  php:
    image: serversideup/php:8.5-fpm-nginx
    ports:
      - 80:8080
Whenever you run commands, you'll need to reference the service name you gave it.
docker compose run php php -v
If you named your service app, you would run the following command:
docker compose run app php -v
Volumes: Sharing files with containers
When you added this to your compose.yml:
volumes:
  - ./:/var/www/html
You created a bind mount that connects your local project directory to the container's /var/www/html directory. This means:
- Changes you make on your computer are instantly visible inside the container
- The container serves your actual project files, not a copy
- When the container stops, your files remain on your computer
This is perfect for development because you can edit files with your favorite editor and see changes immediately without rebuilding the container.
Ports: Accessing your container
The ports configuration maps ports between your computer and the container:
ports:
  - 80:8080
This means "take port 8080 inside the container and make it available on port 80 on my computer." When you visited http://localhost in your browser, you were actually connecting to port 80 on your computer, which Docker forwarded to port 8080 inside the container where NGINX or FrankenPHP was listening.
8000:8080.Environment variables: Configuring your container
Environment variables let you configure your container without modifying the image. When you set:
environment:
  PHP_UPLOAD_MAX_FILE_SIZE: "500M"
  PHP_OPCACHE_ENABLE: "1"
You're telling our PHP images to adjust PHP's configuration. Our images read these variables at startup and automatically configure PHP accordingly. This means the same image can be configured differently for development, staging, and production — just by changing environment variables.
The container lifecycle
Understanding the lifecycle helps you work more effectively with containers:
- Create & Start -
docker compose upcreates and starts containers - Running - Your application is active and serving requests
- Stop -
docker compose downstops containers (but keeps configurations) - Remove - Containers are deleted (but images remain for faster restarts)
Important to know:
- Stopping a container doesn't always delete it
- Restarting is fast because the image is already downloaded
- Any data stored inside the container (not in volumes) is lost when the container is removed
- Your images remain on your machine until you explicitly remove them
Common Docker commands
Here are the essential commands you'll use regularly:
# Start containers (creates if they don't exist)
docker compose up

# Start in background (detached mode)
docker compose up -d

# Stop and remove containers
docker compose down

# View running containers
docker compose ps

# View container logs
docker compose logs

# Follow logs in real-time
docker compose logs -f

# Execute a command in a running container
docker compose exec php php -v

# Rebuild containers after image changes
docker compose up --build

# Remove images to force fresh download
docker compose down --rmi all
-f flag in docker compose logs -f means "follow" — it keeps showing new log entries as they happen. Press + C to stop following.What's next?
Now that you understand the fundamentals of containers, let's create your first containerized PHP project.
Create your first Docker PHP project