Preparing your server
Spin gives you the power to choose any host that you want. Although the responsibility is on your shoulders to get a server set up, Spin makes it very easy to get this accomplished.
Choose a host
We've run VPS Benchmarks against a number of hosts and have found the following hosts to have great value. The links below are referral links, meaning we get a small kickback if you sign up -- but this doesn't affect our recommendations.
Hetzner
Hetzner is a German-based company with data centers in the EU and the US. Their pricing is very competitive and they have incredible performance.
With the link below, they offer €20 (~$21 USD) credits free which can get you a server for a few months.
Vultr
Vultr is a US-based company that has a great reputation for performance and value. They have a wide range of data centers around the world and a great API for automation.
With the link below, they are offering $100 in credits -- which can get you quite a bit for a few months.
Digital Ocean
Digital Ocean is a US-based company that has data centers all around the world. Although their performance generally lacks compared to other providers, there are so many resources that natively support their offerings.
With the link below, they are offering $200 in credits over 60 days.
Any other host
Spin is host-agnostic, meaning you can run Spin anywhere. If you have a preferred host, you can use them as well. Just make sure that your host meets the following requirements below.
Recommended Server Specs
It is best to run spin provision against a brand new server with a fresh installation of Ubuntu 22.04 or newer. This will ensure that the server is in a known state and that the configuration will work as expected.
Hardware specs largely depend on your project, but even for simple apps, we recommend the following:
- CPU: 1 CPU core
- RAM: 1GB
- Storage: >25GB SSD
- Architecture: x86_64 (64-bit) [request ARM64 support]
- Operating System: Ubuntu 22.04 LTS or newer
- Snapshots/Backups: Highly recommended
- Firewall: Configured to allow SSH and HTTPS traffic (22/tcp, 80/tcp, 443/tcp)
- Access: Root SSH access
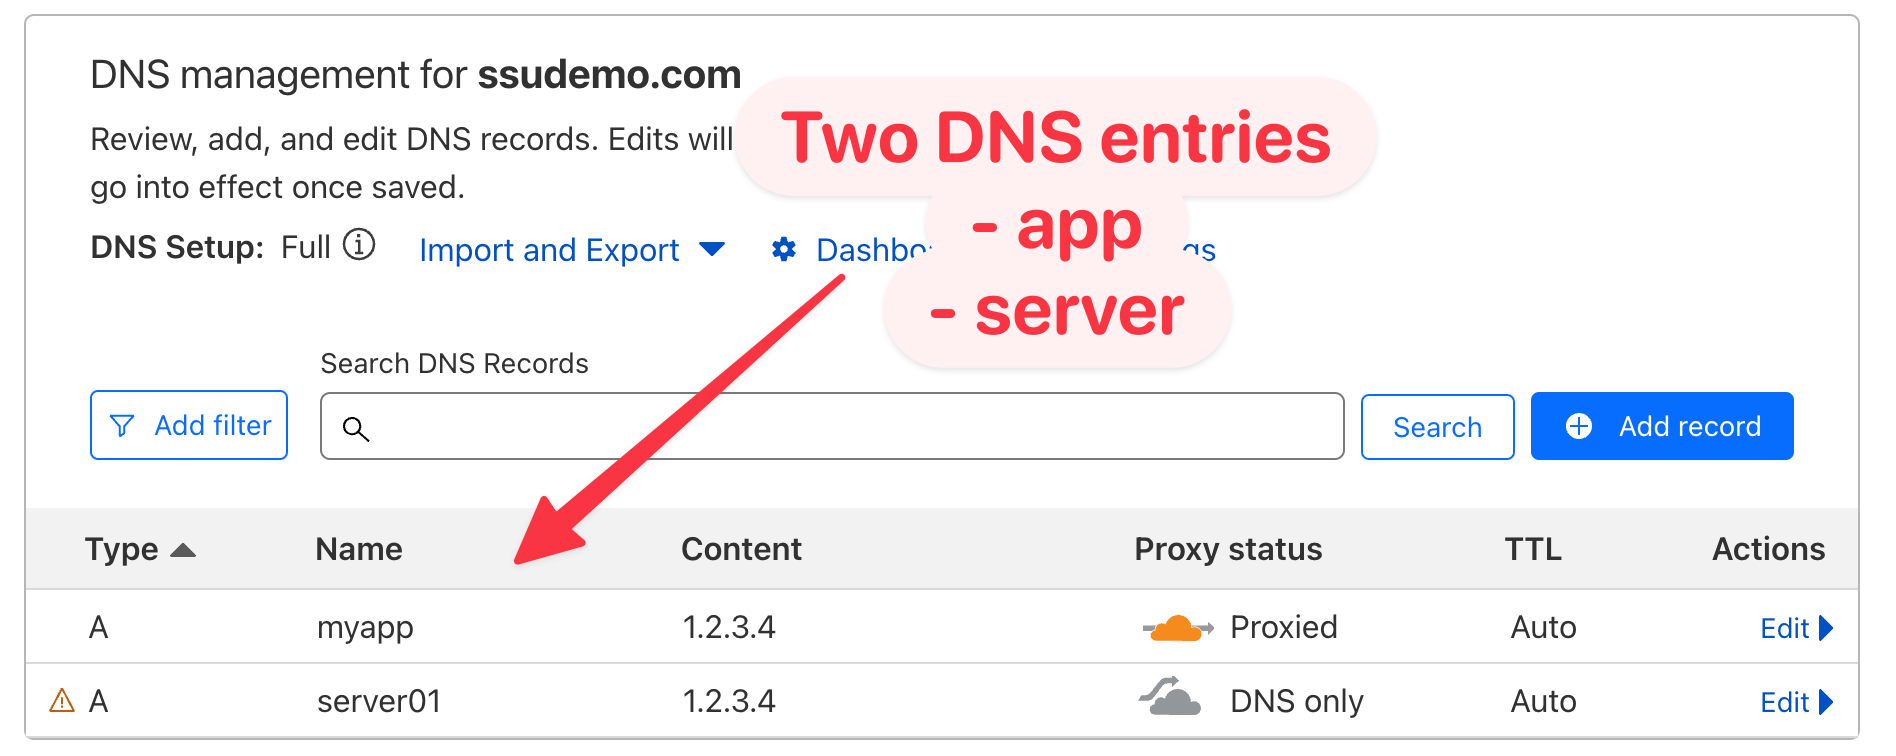
Prepare your DNS
Once you have a server running with the host of your choice, it's recommended to configure your DNS to have two A records created pointing to the IP address of your server.
Two records should be created:
- Application Domain Name (example:
myapp.example.com) - Server Hostname (example:
server01.example.com)
Validate your SSH connection
Before you start, make sure you can SSH into your server using an SSH key pair. Many hosts do this by default, but you need to follow your hosts instructions for adding a trusted public key that can connect to your server. If you need help generating an SSH key, you can follow our guide on Generating a Secure SSH Key.
You can do this by running the following command:
We're assuming your host provisions their Ubuntu images as root as the default user. Use whatever standard your host uses, just as long as it has root access.
SSH into your server
ssh root@myserver01.example.com
Ensure your server is up to date
On your server, it's good practice to ensure everything is updated. Run this command below to update all packages on your server. Restarting the server is a good idea too to ensure everything is up to date.
Update your server
apt -y update && apt -y upgrade && apt -y autoremove && apt -y autoclean && reboot
Configure server inventory and settings
If your files are encrypted, you need to use the spin vault edit command to edit the file. This will decrypt the file, open it in your default editor, and then re-encrypt it when you save and close the file.
Assuming you've already ran spin new or spin init in your project, there are two files that will need to be configured:
.spin-inventory.ini.spin.yml
Inventory
We call the list of our servers "inventory". This follows the Ansible Inventory format. For example, if you wanted to add server01.example.com as the production server, we would configure our file to look like this and add this server to go underneath the production_manager_servers group:
Be sure to use your server's hostname (NOT your application's domain name) in the inventory file. This will ensure we have a dedicated DNS entry for managing your server.
.spin-inventory.ini: Add `server01.example.com` to Production
####################
# Host Types
####################

[production_manager_servers]
server01.example.com

[staging_manager_servers]
# server02.example.com

####################
# Swarm Roles
####################
[swarm_managers:children]
production_manager_servers
staging_manager_servers

####################
# Environment
####################
[production:children]
production_manager_servers

[staging:children]
staging_manager_servers

[all_servers:children]
production
staging
Configure server settings
In the .spin.yml file, you will find many other settings. These are required for you to change so you can connect to your server.
👉 Required to be changed
If you intend to use GitHub Actions, we strongly recommend creating a dedicated SSH key pair for a "deploy" user (instead of using your own login, like bob).
| Key | Description |
|---|---|
server_contact | Change this to a valid email. If you're using our Traefik templates, you'll also need to change the letsencryptresolver.acme.email key under the .infrastructure/conf/traefik/prod/traefik.yml file. |
docker_user.authorized_ssh_keys | OPTIONAL: Use this only if you're having something like GItHub Actions connect as the Docker User. This must be the public key of the your DEPLOY user SSH keypair that you generated. |
users.username | Set this to a username that you'll remember. Be sure to not use any weird characters. It might be in your best interest to match the username of your local machine. You can find this by running whoami in a new terminal. |
users.password | Set this to the secure hash of the password you'd like to use. All users will be prompted to change on first login. Use spin mkpasswd to quickly generate a hash. |
users.username.authorized_ssh_keys | Set this to your USER public SSH key value. ⚠️ The key pair must be accessible under ~/.ssh on your host. Most of the time the file ends in *.pub. |
.spin.yml
---
###########################################
# Basic Server Configuration
###########################################
server_timezone: "Etc/UTC"
server_contact: changeme@example.com # 👈 Change this

# SSH
ssh_port: "22"

## Email Notifications
postfix_hostname: "{{ inventory_hostname }}" # ✅ Set automatically

## Set variables below to enable external SMTP relay
# postfix_relayhost: "smtp.example.com"
# postfix_relayhost_port: "587"
# postfix_relayhost_username: "myusername"
# postfix_relayhost_password: "mysupersecretpassword"

##############################################################
# Deploy User
##############################################################
docker_user:
  username: deploy
  uid: 9999
  group: deploy
  secondary_groups: "docker"
  gid: 9999
  ## Uncomment to set authorized SSH keys for the docker user.
  # authorized_ssh_keys:
  #   - "ssh-ed25519 AAAAC3NzaC1lZDI1NTE5AAAAIKNJGtd7a4DBHsQi7HGrC5xz0eAEFHZ3Ogh3FEFI2345 deploy" # 👈 Change this
  #   - "ssh-ed25519 AAAAC3NzaC1lZDI1NTE5AAAAIFRfXxUZ8q9vHRcQZ6tLb0KwGHu8xjQHfYopZKLmnopQ anotherfake@key"

##############################################################
# Users
##############################################################

### Use the template below to set users and their authorized keys
## Passwords must be set with an encrypted hash. To do this, see the Ansible FAQ.
## Your best bet is probably using the `mkpasswd` on a Linux machine.
## https://docs.ansible.com/ansible/latest/reference_appendices/faq.html#how-do-i-generate-encrypted-passwords-for-the-user-module

users:
  - username: alice # 👈 Change this
    name: Alice Smith  # 👈 Change this
    state: present
    groups: ['adm','sudo']
    password: "$6$mysecretsalt$qJbapG68nyRab3gxvKWPUcs2g3t0oMHSHMnSKecYNpSi3CuZm.GbBqXO8BE6EI6P1JUefhA0qvD7b5LSh./PU1" # 👈 Change this
    shell: "/bin/bash"
    authorized_keys:
      - public_key: "ssh-ed25519 AAAAC3NzaC1lmyfakeublickeyMVIzwQXBzxxD9b8Erd1FKVvu alice" # 👈 Change this

#   - username: bob
#     name: Bob Smith
#     state: present
#     password: "$6$mysecretsalt$qJbapG68nyRab3gxvKWPUcs2g3t0oMHSHMnSKecYNpSi3CuZm.GbBqXO8BE6EI6P1JUefhA0qvD7b5LSh./PU1"
#     groups: ['adm','sudo']
#     shell: "/bin/bash"
#     authorized_keys:
#       - public_key: "ssh-ed25519 AAAAC3NzaC1anotherfakekeyIMVIzwQXBzxxD9b8Erd1FKVvu bob"
Run spin provison
Once you have .spin.yml and .spin-inventory.ini configure, you're ready to provision your server(s).
Notice how we're using --user root in the command below. This is because most hosts provision root as the default user.
By default spin provision will attempt to connect over SSH using the username on your workstation (how SSH works by default). Since your server doesn't come with your username already created, we need to connect as root on our first provision so Spin can configure the accounts configured in .spin.yml.
Provision your server(s)
spin provision --user root
This process will automatically download our Ansible collection and apply the changes on your server.
Confirm everything works
To confirm everything works as expected, try to SSH into your server using the username you created before. You will be prompted to change your password to a new password as soon as you login.
Connect to your server via SSH
ssh myuser@server01.example.com
If you get a connection, you should be ready to receive deployments to Docker Swarm via SSH 🥳
Next Steps
If you're using the spin deploy deployment strategy, then take a look at our guide on how to run a simple deployment.