
 Hire Us
How to configure a WireGuard macOS client
Jay Rogers
May 24th, 2020

I am continuing my "mini-course" on Gain Flexibility & Increase Privacy with WireGuard VPN. If you haven't seen that, that link is a great place to start.
What you'll achieve
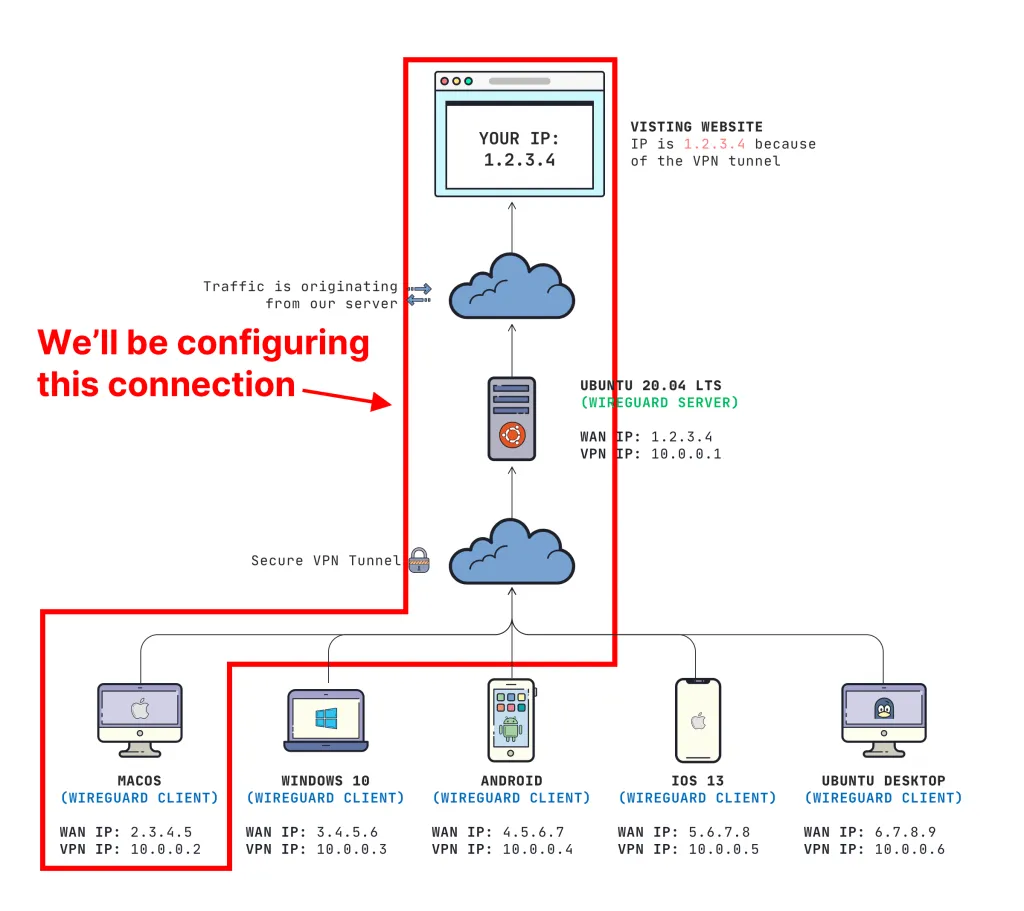
- We will be connecting our macOS client to send traffic through our Ubuntu 20.04 WireGuard VPN server
This is what it looks like:
Prerequisites
- You need a working WireGuard VPN Server (learn how to set that up here)
- You need a macOS computer with admin privileges
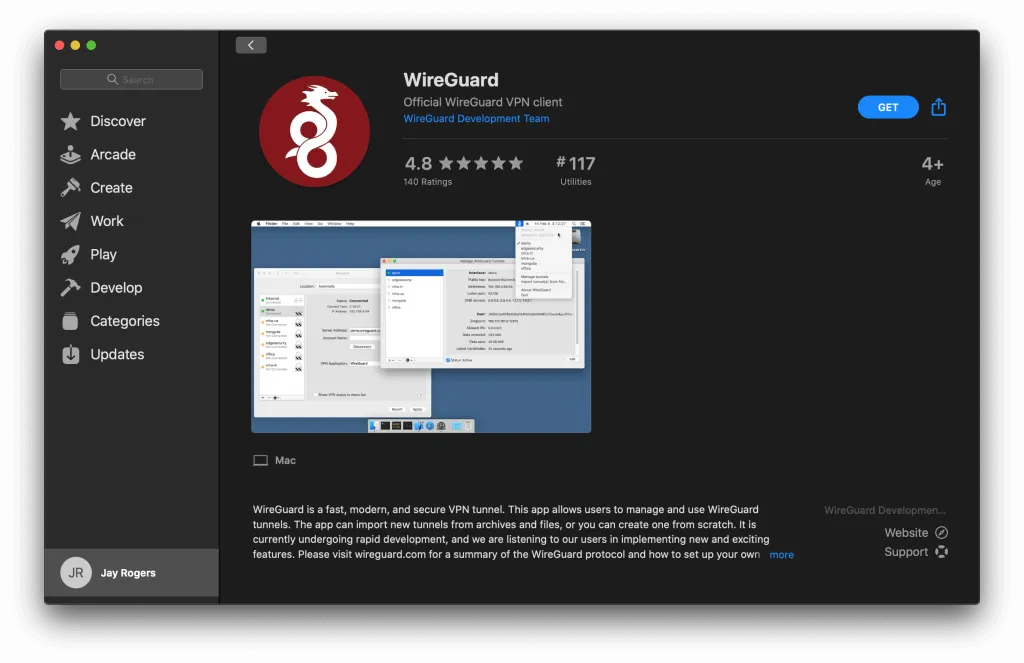
Download WireGuard Client from the macOS App Store
You can find the official app on the App Store here.
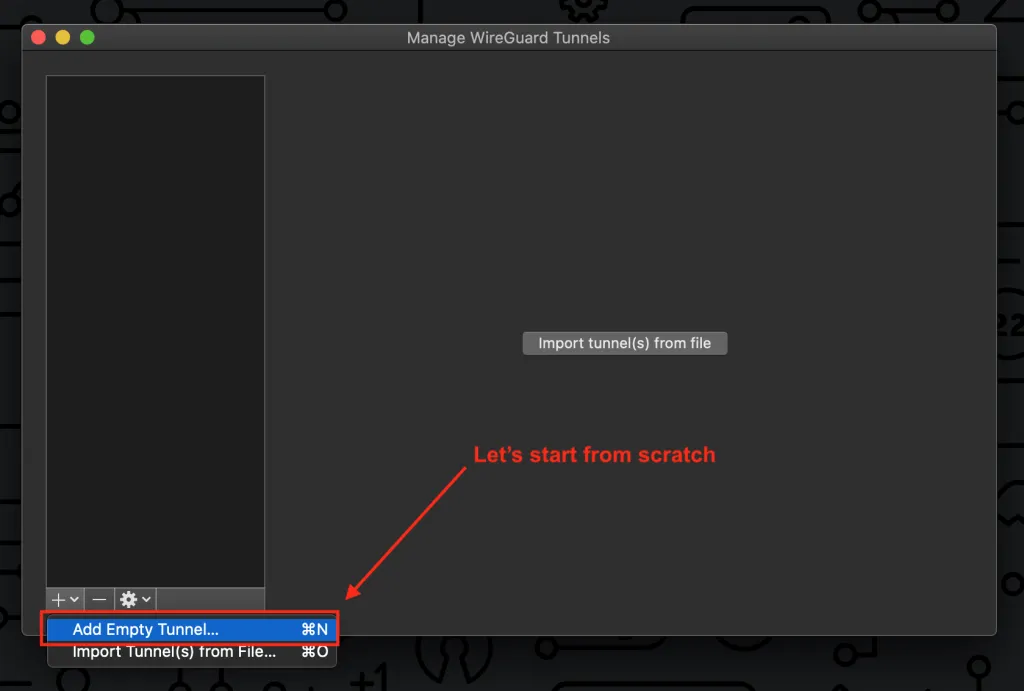
Add an empty tunnel
We want need to create a tunnel, so let's start from scratch.
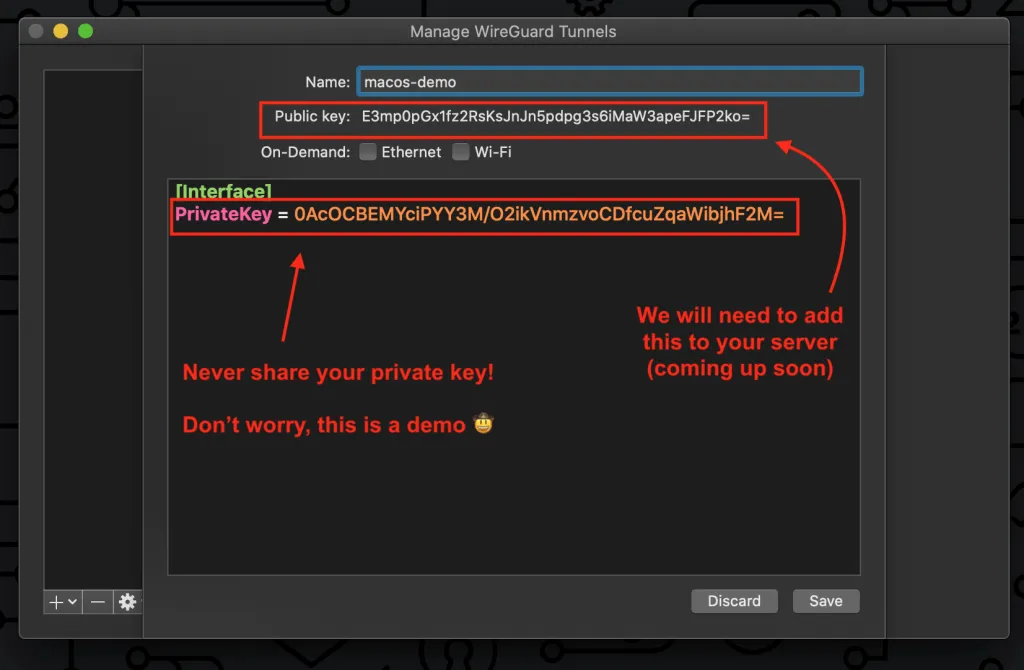
You will see that it will generate keys for you. Remember that, because we will need it.
You'll also notice that there is an option for On-demand for "Ethernet" and "Wi-Fi". You can enable this if you ALWAYS want to connect to your VPN when your local network connection becomes active.
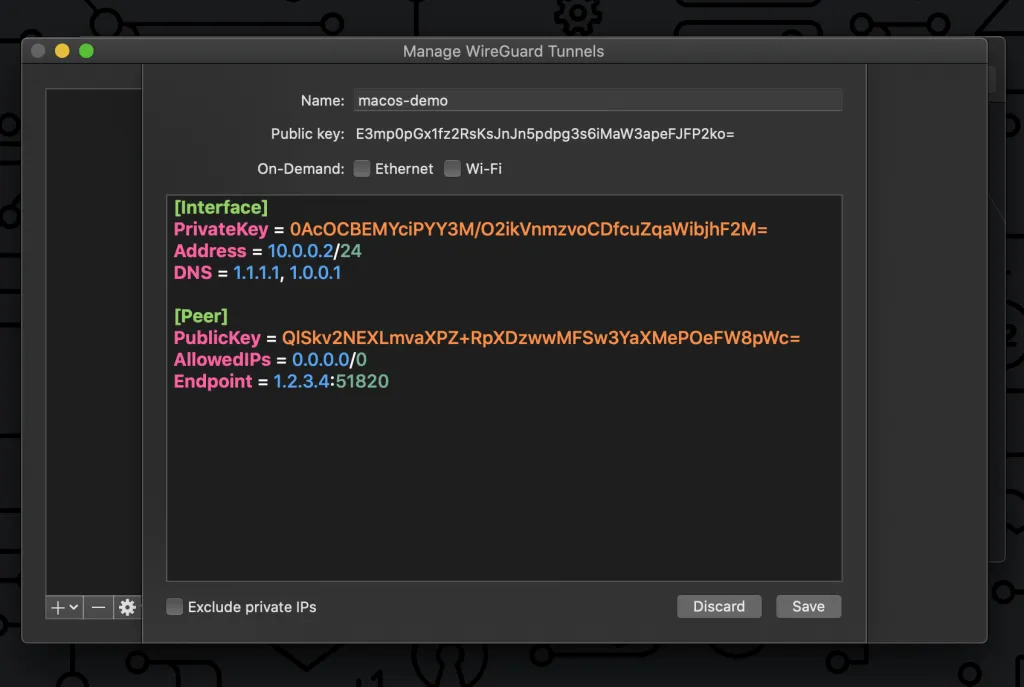
Add your server information
Now we need to add a few more things to get it working. Add your server as a "peer" and configure your IP Address & DNS for the remote network. Read my other post if you want to understand this in detail.
[Interface]
PrivateKey = abcdefghijklmnopqrstuvwxyz1234567890=+
Address = 10.0.0.3/24
DNS = 1.1.1.1, 1.0.0.1

[Peer]
PublicKey = YOUR_SERVER_PUBLIC_KEY
AllowedIPs = 0.0.0.0/0
Endpoint = YOUR_SERVER_WAN_IP:51820
IMPORTANT: You need to replace YOUR_SERVER_PUBLIC_KEY and YOUR_SERVER_WAN_IP
Here is what mine looks like (compare it to the diagram at the beginning of the post for more detail):
Upon saving, you might get a message like this:
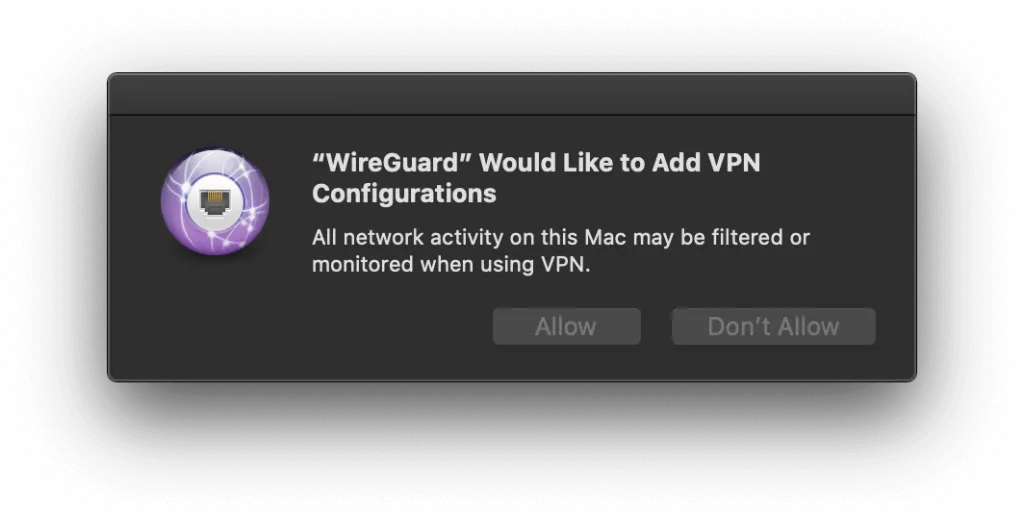
This is a good message. Make sure to press Allow so you can manage the VPN natively within the macOS Network Manager.
Add the client to your server
Your server needs to know who you are. For more information
ON YOUR SERVER run this command:
sudo wg set wg0 peer YOUR_CLIENT_PUBLIC_KEY allowed-ips YOUR_CLIENT_VPN_IP
Replace YOUR_CLIENT_PUBLIC_KEY with your generated public key and YOUR_CLIENT_VPN_IP with the IP address you should be authorized to use (10.0.0.2 in my example).
For more information on why you need to run this command, check out my "important concepts" post on how this all works.
Test your connection
Once connected, you can head over to dnsleaktest.com to make sure your DNS is not "leaking". If you followed my configuration, you should see your DNS provider as CloudFlare. Head on over to fast.com and see what kind of speeds you are pulling as well!
That's all!
If you like content like this, consider signing up on our mailing list or follow me on Twitter.
Want to work together?
Professional developers choose Server Side Up to ship quality applications without surrendering control. Explore our tools and resources or work directly with us.

Join our community
We're a community of 3,000+ members help each other level up our development skills.
 Join our Discord
 Platinum Sponsors

Active Discord Members
We help each other through the challenges and share our knowledge when we learn something cool.
Stars on GitHub
Our community is active and growing.
Newsletter Subscribers
We send periodic updates what we're learning and what new tools are available. No spam. No BS.
Sign up for our newsletter
Be the first to know about our latest releases and product updates.
We're a community empowering product builders with self-hosted tools and open source solutions.