
 Hire Us
Getting started with WireGuard VPN: Important Concepts
Jay Rogers
May 21st, 2020

VPNs have exploded in use over the last few years. We all know it increases our privacy, but there are a lot of crap VPN solutions out there too.
WireGuard is the latest "cool kid" to come to the VPN block and it shows up with a lot of promises:
- It's lightweight: WireGuard uses 4,000 lines of code compared to OpenVPN's 100,00 lines of code (source)
- It's fast: Many users are reporting much higher throughput and lower response times
- It's secure: Legacy VPN solutions struggle supporting modern cryptography while still maintaining good performance
- It's supported: Linus Torvalds just merged WireGuard into the Linux kernel this year
- BEST OF ALL - It's easy: Compared to other solutions, WireGuard is a breeze. If you know how to configure SSH, you know how to configure WireGuard.
What you'll achieve
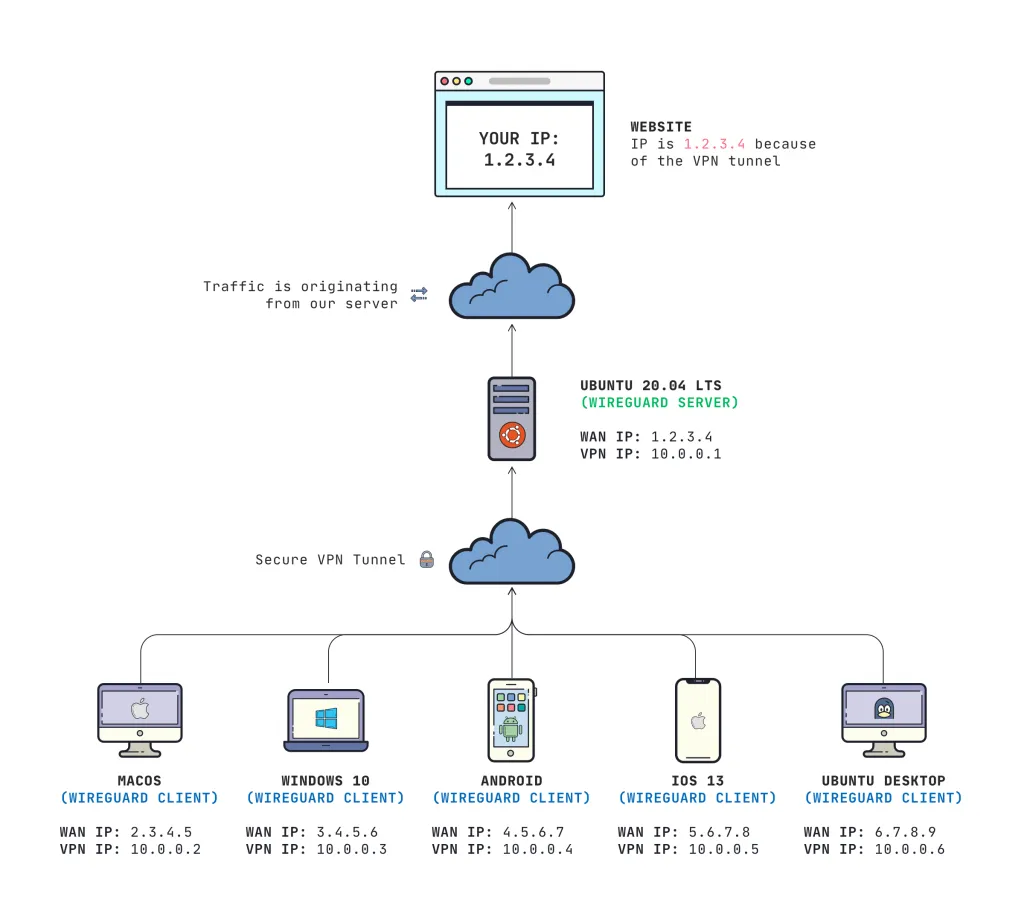
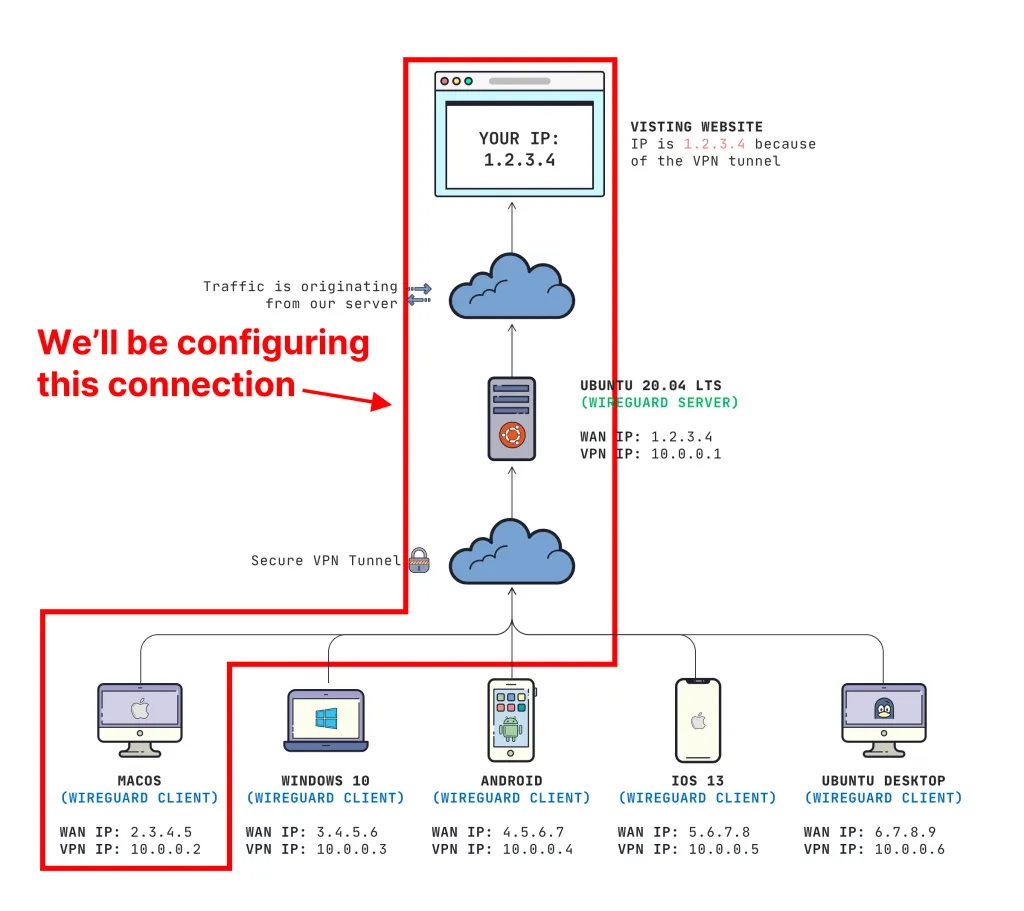
Throughout this mini-course we will be creating a private VPN server that allow our clients to securely send their internet traffic through our server's IP address.
On completion, you'll be able to:
- Install WireGuard VPN server on Ubuntu Server 20.04
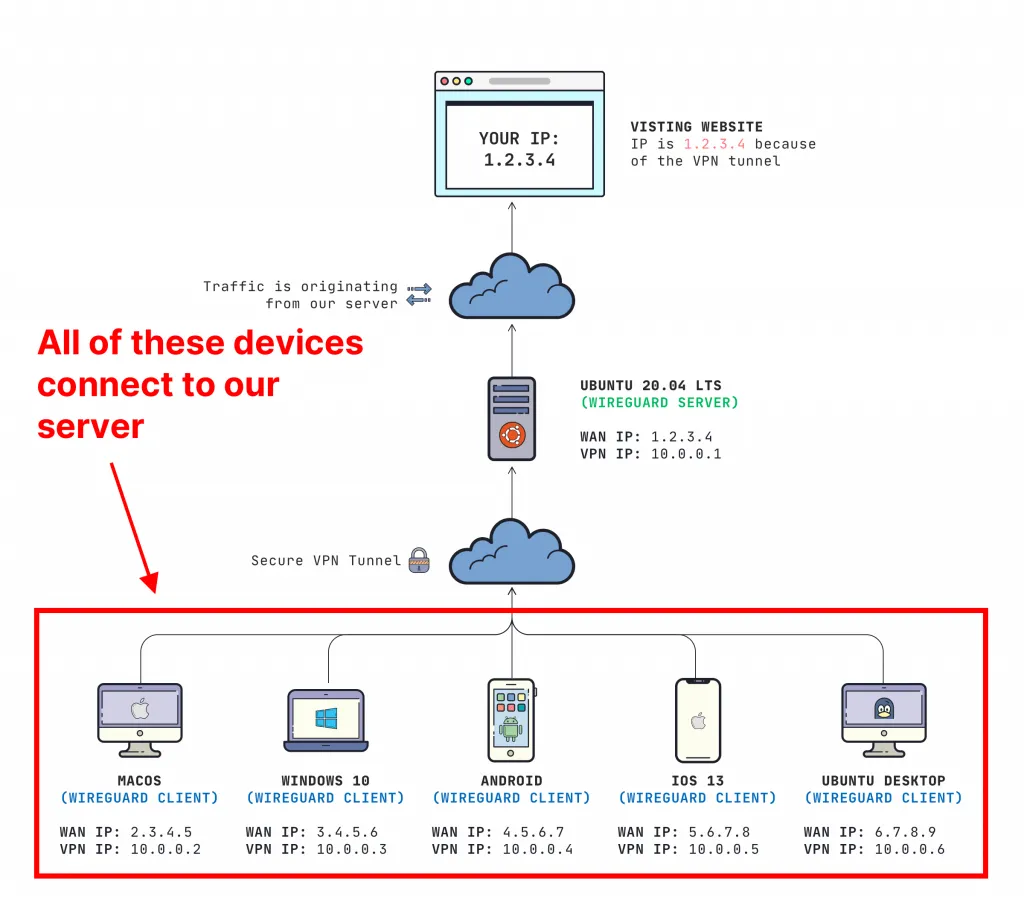
- Configure macOS, Windows 10, Android, iOS 13, and Ubuntu 20.04 Desktop as clients to securely send their internet traffic through your server
Here's what it will look like:
Prerequisites
- You'll need some basic knowledge how to connect to a Linux server via SSH
- You need some basic understanding of IP addresses and subnets
- You have clients that are running Windows, macOS, Linux, iOS, or Android
Important concepts to understand
My favorite thing about WireGuard is it's simplicity. It works very similar to SSH and is much easier to set up compared to alternatives like OpenVPN and L2TP.
The most important things to know are:
- Each device on the virtual network has a unique "Private/Public Key Pair" (this is how WireGuard verifies identity, like SSH)
- Each device on the virtual network has its own "Virtual Interface", with its own unique IP address
- Addresses are not assigned via DHCP. You must configure each interface to have its unique static IP address on the virtual network that you are creating (
10.0.0.3/24for example) - Each client must have their public key added to the **server's** configuration file (this is you authorizing who is allowed to be on the virtual network)
The WireGuard VPN Server
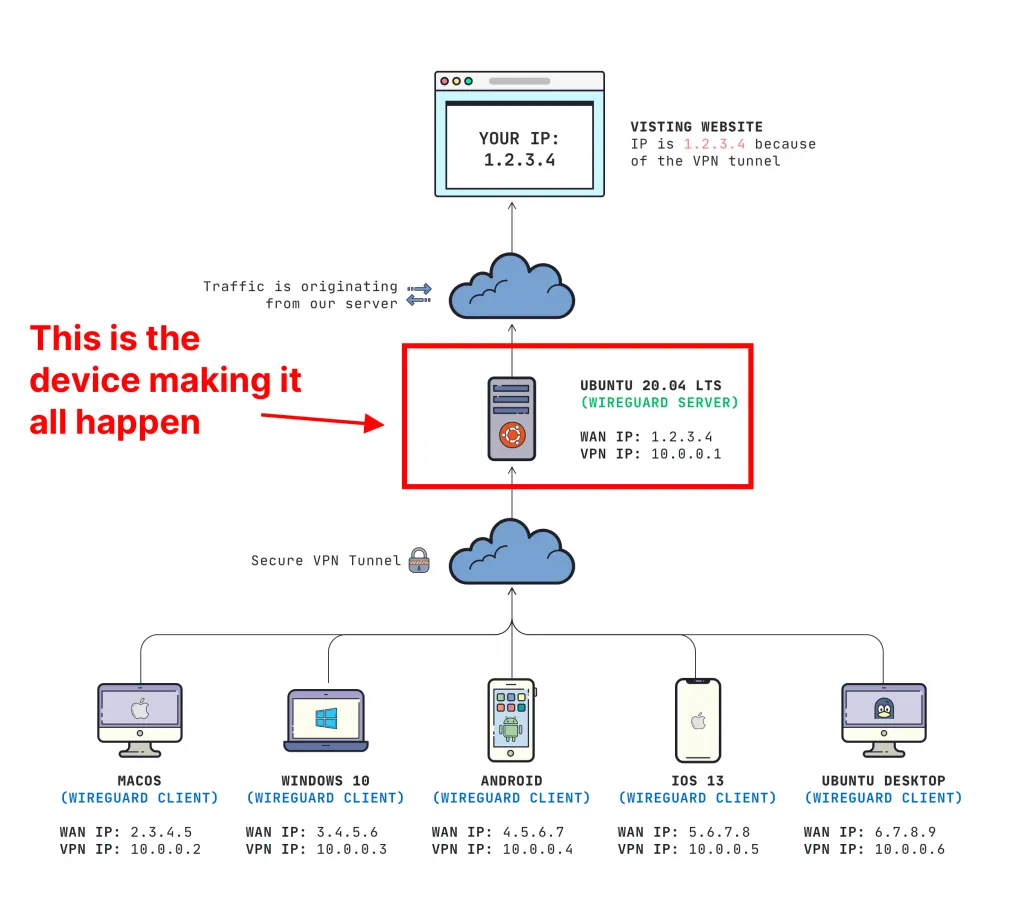
The WireGuard VPN Server is your most important device. All of our traffic from the clients will route through the device that you choose to be your "server". Every device that routes traffic through our server will have the same WAN (Internet) IP Address as our server (in our example, 1.2.3.4).
Not sure where you get a server? You can always find a decent server for $5/mo on Digital Ocean, Vultr, or Linode.
Server configuration file
In the next post, I have instructions on how to perform the actual installation, but I don't want you to focus on that right now. Let's just get our feet wet with how the configuration file looks.
Here is an example of a server configuration file:
[Interface]
Address = 10.0.0.1/24
ListenPort = 51820
PrivateKey = YOUR_SERVER_PRIVATE_KEY
PostUp = iptables -A FORWARD -i %i -j ACCEPT; iptables -t nat -A POSTROUTING -o eth0 -j MASQUERADE
PostDown = iptables -D FORWARD -i %i -j ACCEPT; iptables -t nat -D POSTROUTING -o eth0 -j MASQUERADE
SaveConfig = true
What does this all mean?
The above file does some pretty magical things, but here's what it really means:
[Interface]: This is a block in our config telling WireGuard that we are configuring an interface. We will set other options later.Address: This is the IP address that our WireGuard VPN Interface will have on the VPN network. This is important to have all clients on the same subnet as the server. Our server's IP will be10.0.0.1in this example.ListenPort: This is setting what UDP port our WireGuard server should accept connections on. You can change this if you really want, but make sure your clients know about this port.PrivateKey: This is your SERVER private key that we will generate at "/etc/wireguard/keys/server.key"Post Up&PostDown: These are scripts that run at the time of bringing the interface up or down. In this example, we want to enable "masquerading" which allows VPN traffic to access the internet. We add the rule when bringing the interface up, and delete the rule when bringing the interface downSaveConfig: It is possible to configure WireGuard through CLI. So we set this totrueso we can write any changes when bringing down the interface.
Client configuration file
Clients have their own configuration file and use very similar syntax. This is an example is what a WireGuard config file looks like for a CLIENT:
[Interface]
PrivateKey = YOUR_CLIENT_PRIVATE_KEY
Address = 10.0.0.3/24
DNS = 1.1.1.1, 1.0.0.1

[Peer]
PublicKey = YOUR_SERVERS_PUBLIC_KEY
AllowedIPs = 0.0.0.0/0
Endpoint = YOUR_SERVER_WAN_IP:51820
Here is what each field means:
[Interface]
This is where we will configure the following properties for the client's virtual interface:
PrivateKey: This is your CLIENT **private** key that is generated (never share this)Address: The IP address for our virtual interface for the client. This must be on the same subnet as the server and unique across every device on the virtual network.DNS: These are the DNS servers in which your connection will use. You can do fancy things with this, but in this example we are just going to set this to CloudFlare's DNS servers.
[Peer]
These are properties set to connect to our server
PublicKey: This is your SERVER **public** key that is generated. On our server, we will save this value at "/etc/wireguard/keys/server.key.pub". It is safe to share a public key, but NEVER share the private keyAllowedIPs: Setting this to0.0.0.0/0is saying that we want ALL traffic from our client to route through our VPN interfaceEndpoint: This is the WAN (or Internet) IP address of where your client should connect to. This will be the WAN (Internet) IP of our server. This would be1.2.3.4in my diagram example.
What about authentication?
It would be kind of pointless to have our VPN server allow anyone to connect. This is where our public & private keys come into play.
- Each client's **public** key needs to be added to the SERVER'S configuration file
- The server's **public** key added to the CLIENT'S configuration file
By both the client and the server knowing each other's public key, a few awesome things happen here:
- Random trolls won't be able to join your VPN network (because it authenticates the key -- much more secure than a password)
- You are prevented from being victim to a man-in-the-middle attack
This is why it is also important to NEVER SHARE your private key. If someone gets a hold of that, your connection can be compromised.
What adding clients to a server looks like
Once you have each keypair created, configuring is quite simple. ON YOUR SERVER you will run this command:
sudo wg set wg0 peer YOUR_CLIENT_PUBLIC_KEY allowed-ips YOUR_CLIENT_VPN_IP
IMPORTANT: You need to replace YOUR_CLIENT_PUBLIC_KEY and YOUR_CLIENT_VPN_IP
So assuming I had this configuration:
This is the command that I would run on my server:
sudo wg set wg0 peer E3mp0pGx1fz2RsKsJnJn5pdpg3s6iMaW3apeFJFP2ko= allowed-ips 10.0.0.2
This is granting the "E3mp0..." public key to access the network on 10.0.0.2. That's a very handy command that we will be using later.
Getting to the installation
Rather than cramming everything into one post, I created separate posts so you can pick based off of what you need. You can see the entire mini-course here.
Server install:
Client configuration:
- Set up WireGuard client on Windows 10
- Set up WireGuard client on macOS Catalina
- Set up WireGuard client on iOS 13
- Set up WireGuard client on Android
Hope this helps!
I really hope you found this guide helpful. If you appreciated it, drop a line down in the comments or you can always hit me up on Twitter (@jaydrogers). Be sure to jump on our mailing list if you want to read more articles like this in the future.
Any questions, just let me know!
Want to work together?
Professional developers choose Server Side Up to ship quality applications without surrendering control. Explore our tools and resources or work directly with us.

Join our community
We're a community of 3,000+ members help each other level up our development skills.
 Join our Discord
 Platinum Sponsors

Active Discord Members
We help each other through the challenges and share our knowledge when we learn something cool.
Stars on GitHub
Our community is active and growing.
Newsletter Subscribers
We send periodic updates what we're learning and what new tools are available. No spam. No BS.
Sign up for our newsletter
Be the first to know about our latest releases and product updates.
We're a community empowering product builders with self-hosted tools and open source solutions.