
 Hire Us
Custom Markers on Google Map
Dan Pastori
November 9th, 2017
One of the coolest aspects of Google Maps is how easy it is to customize EVERY detail. You can change the colors, the info windows, the data displayed, and even the markers! This is a small tutorial that continues off of of the previous tutorial of displaying resources on a Google Map with VueJS Displaying Resources on a Google Map With Vue JS. This tutorial can work with any implementation of a Google Maps but we will be using the one from our last tutorial which is in VueJS to add our custom markers. All of the documentation for Javascript Google Maps Markers is here Markers | Google Maps JavaScript API | Google Developers for your reference!
Step 1: Open The CafeMap.vue component
First thing we need to do is open our /resources/assets/js/components/cafes/CafeMap.vue component. In this component is where we have our Google Maps implementation and we add all of our markers.
We need to find the buildMarkers() method. In there, you will see a a few lines of code like this:
/*
  Create the marker for each of the cafes and set the
  latitude and longitude to the latitude and longitude
  of the cafe. Also set the map to be the local map.
*/
var marker = new google.maps.Marker({
  position: { lat: parseFloat( this.cafes[i].latitude ), lng: parseFloat( this.cafes[i].longitude ) },
  map: this.map
});
What this does is create a new Google Maps Marker and in that creation, we need to set an image. For this tutorial I created a map icon made from the coffee png found here: http://www.freeiconspng.com/img/13684 and map marker svg found here: Fill, map, pin icon | Icon search engine.
The image we are using lis located in /public/img/coffee-marker.png. First we need to set a variable with the image URL above our new marker declaration:
/*
  Create the marker for each of the cafes and set the
  latitude and longitude to the latitude and longitude
  of the cafe. Also set the map to be the local map.
*/
var image = '/img/coffee-marker.png';

var marker = new google.maps.Marker({
  position: { lat: parseFloat( this.cafes[i].latitude ), lng: parseFloat( this.cafes[i].longitude ) },
  map: this.map
});
Next, we need to tell the new marker to use the image. We do this in the JSON passed to create a new marker like this:
/*
  Create the marker for each of the cafes and set the
  latitude and longitude to the latitude and longitude
  of the cafe. Also set the map to be the local map.
*/
var image = '/img/coffee-marker.png';

var marker = new google.maps.Marker({
  position: { lat: parseFloat( this.cafes[i].latitude ), lng: parseFloat( this.cafes[i].longitude ) },
  map: this.map,
  icon: image
});
We just set the icon key to the new image and voila! Now when we view our map, we should see our new icon!
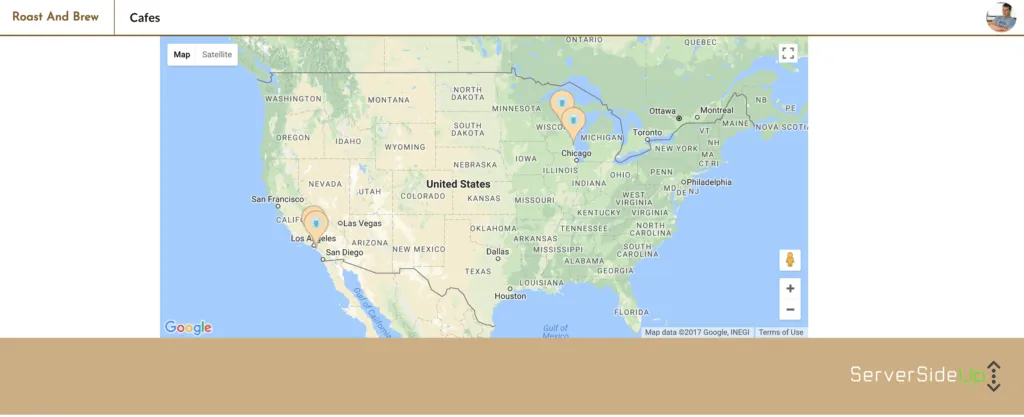
There's a lot of other cool things we will be doing with the markers, but changing the image is a huge step to making the map look and feel more like your site!
Conclusion
This is a pretty simple tutorial on just changing the map markers, but we will continue to customize our map to make it look and feel like our app. Keep following along and check out the repo for all of the source code: GitHub - serversideup/roastandbrew
Want to work together?
Professional developers choose Server Side Up to ship quality applications without surrendering control. Explore our tools and resources or work directly with us.

Join our community
We're a community of 3,000+ members help each other level up our development skills.
 Join our Discord
 Platinum Sponsors

Active Discord Members
We help each other through the challenges and share our knowledge when we learn something cool.
Stars on GitHub
Our community is active and growing.
Newsletter Subscribers
We send periodic updates what we're learning and what new tools are available. No spam. No BS.
Sign up for our newsletter
Be the first to know about our latest releases and product updates.
We're a community empowering product builders with self-hosted tools and open source solutions.