
 Hire Us
API Driven Form Submissions with Javascript, Vuex and Laravel
Dan Pastori
October 26th, 2017
We are now at the point where we can begin adding some functionality to our application. In most cases, this requires some sort of data to compute or display. To do that, we need to add a way to add data to our application. Since we are building an application to help coffee enthusiasts find their next cup of coffee, we should begin by allowing authenticated users to submit coffee shops to our application. Whenever you are working with a form in the sense of a Single Page Application, everything has to work together from the Laravel API to the Vuex module calling the Javascript route and updating the Vuex data store. There's lots of moving parts, but if you break it down, it's not that bad.
Step 1: Revisit What We Already Have
We already have a route set up in our API to add a cafe that requires the following parameters:
- Name
- Address
- City
- State
- Zip
These are the most basic of parameters for a cafe, we will be adding a lot more later!
We also already have a Vue Router route set up for adding a cafe which is /cafes/new and a template for adding a cafe in the /resources/assets/js/pages/NewCafe.vue file.
Since we have been prepared for this, we also have a Javascript API call set up in the /resources/assets/js/api/cafe.js file that accepts the 5 parameters to submit to a cafe.
We still have a few things we need to do and those are:
- Add a form to the NewCafe.vue file that can be submitted with the new cafe.
- Send an action request to our Cafes module that we will be submitting a new cafe.
- Submit the new cafe through our Javascript API
- Return either success or failure back to our front end, specifically the Vuex module.
- Reload the cafes and update our Vuex module.
This is the basic flow for adding ANY content to our database with an API Driven perspective and a single page application with VueJS/Vuex.
Let's get started!
Step 1: Add a Form to the NewCafe.vue Page
First we should open our /resources/assets/js/pages/NewCafe.vue file. We have nothing in this page right now, but in the template of the file, we will be adding our form.
Our form right away should be very simple and just have some empty text fields that match the data we need to collect for our new cafe:
<div class="page">
    <form>
        <div class="grid-container">
            <div class="grid-x grid-padding-x">
                <div class="large-12 medium-12 small-12 cell">
                    <label>Name
                        <input type="text" placeholder="Cafe name">
                    </label>
                </div>
                <div class="large-12 medium-12 small-12 cell">
                    <label>Address
                        <input type="text" placeholder="Address">
                    </label>
                </div>
                <div class="large-12 medium-12 small-12 cell">
                    <label>City
                        <input type="text" placeholder="City">
                    </label>
                </div>
                <div class="large-12 medium-12 small-12 cell">
                    <label>State
                        <input type="text" placeholder="State">
                    </label>
                </div>
                <div class="large-12 medium-12 small-12 cell">
                    <label>Zip
                        <input type="text" placeholder="Zip">
                    </label>
                </div>
            </div>
        </div>
    </form>
</div>
You will notice a few things: 1. The grid layout is Zurb Foundation 6.4 XY-Grid and some of the styles are already pre-defined. To read more about the grid layout, check out the docs here: Forms | Foundation for Sites 6 Docs 2. I added a page container <div> with a class of page. I defined this in the the /resources/assets/sass/layouts/_page.scss file and just gave the page a margin top of 25px so we have some breathing room. Following the 7-1 pattern, layouts would be the best place to put this component. We can also re-use this across all of our pages.
Now we need to set up our models in our page. First we need to add a data() function to our page component and have it return an object like this:
data(){
    return {

    }
}
This will return the variables we will use for our models in our form. We now need to add these variables in our data object:
data(){
    return {
        name: '',
        address: '',
        city: '',
        state: '',
        zip: ''
    }
}
Now we need to add the v-model parameter to each of our inputs and bind the data to one of the variables in the object being returned by our component.
What we are doing is binding the value of each of our inputs to a piece of data in our page model. Vue takes care of all of the updates when we type into an input. We can also access these variables inside of our component and do actions like pass them to actions to save to the database.
For more information visit: Components — Vue.js for more on data and for the v-model visit: Components — Vue.js
Our page should now look like:
<style>

</style>

<template>
  <div class="page">
    <form>
      <div class="grid-container">
        <div class="grid-x grid-padding-x">
          <div class="large-12 medium-12 small-12 cell">
            <label>Name
              <input type="text" placeholder="Cafe name" v-model="name">
            </label>
          </div>
          <div class="large-12 medium-12 small-12 cell">
            <label>Address
              <input type="text" placeholder="Address" v-model="address">
            </label>
          </div>
          <div class="large-12 medium-12 small-12 cell">
            <label>City
              <input type="text" placeholder="City" v-model="city">
            </label>
          </div>
          <div class="large-12 medium-12 small-12 cell">
            <label>State
              <input type="text" placeholder="State" v-model="state">
            </label>
          </div>
          <div class="large-12 medium-12 small-12 cell">
            <label>Zip
              <input type="text" placeholder="Zip" v-model="zip">
            </label>
          </div>
        </div>
      </div>
    </form>
  </div>
</template>

<script>
  export default {
    data(){
      return {
        name: '',
        address: '',
        city: '',
        state: '',
        zip: ''
      }
    }
  }
</script>
We have a very basic form where each input is bound to a piece of data.
For fun you can use the Vue inspector in your browser and see each model update as you type. You just have to find the page component and you will see the data you added: 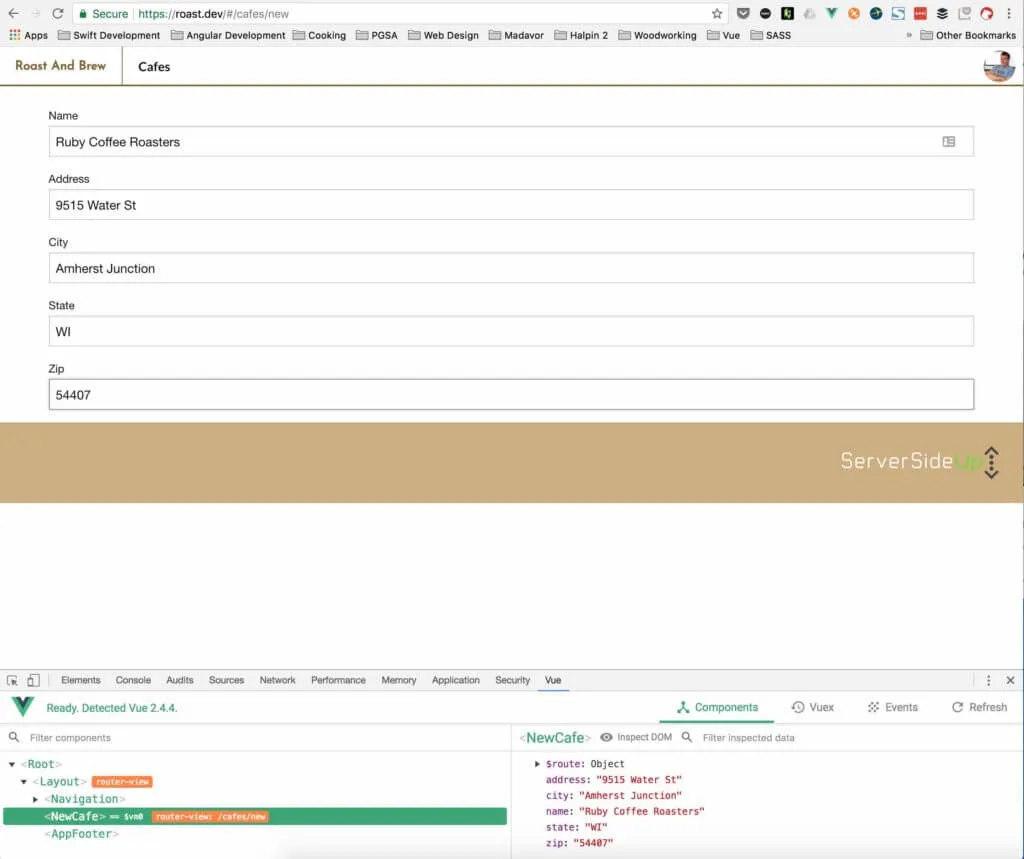
Finally, we will have to add a simple submit button and create a method in our page component to handle a click. This is how we will kick off our form submission.
Right after our zip field row, I added:
<div class="large-12 medium-12 small-12 cell">
    <button class="button" v-on:click="submitNewCafe()">Add Cafe</button>
</div>
You will notice a component v-on:click="submitNewCafe()". What this is doing is binding an event handler on our button to a method in our Vue component. We need to add the submitNewCafe() method to our methods object like this:
methods: {
    submitNewCafe(){

    }
}
Now whenever a user clicks on the Add Cafe button, we will call the method to submit a new cafe.
Step 2: Send Action To Submit New Cafe
We are now ready to submit an action to our Vuex module saying "hey, we want to add this new cafe!" To do that, we will stay in our NewCafe.vue file and work with the submitNewCafe() method.
Since we are calling an action on a Vuex module, we need to dispatch an addCafe method which we will implement on our module in the next step. The first parameter of the store dispatch method is the name of the action being dispatched. The second parameter is a JSON object containing the data we want to send in the action. In this case, it will be the value of our inputs.
The submitNewCafe() method should look like:
submitNewCafe(){
    this.$store.dispatch( 'addCafe', {
        name: this.name,
        address: this.address,
        city: this.city,
        state: this.state,
        zip: this.zip
    });
}
If you are new to VueJS, the this. references the local component's data value. So what we are doing is dispatching an addCafemethod that will be received by our cafes Vuex module containing all of the data from our form.
Step 3: Handle addCafe action in cafes Vuex Module
So now we have the action being dispatched, but nothing to catch the action so that's what we are doing now.
We will need to open our /resources/assets/js/modules/cafes.js file to edit the module.
First, we need to add a variable to our state which will keep track of our cafe add status. We should simply add: cafeAddStatus: 0 at the end of our state which will initialize our variable.
Our state should look like:
/*
  Defines the state being monitored for the module.
*/
state: {
  cafes: [],
  cafesLoadStatus: 0,

  cafe: {},
  cafeLoadStatus: 0,

  cafeAddStatus: 0
},
Now we should add our method to handle the addition of the cafe. Right after we defined our loadCafe method, we should add the following method in the actions object:
/*
  Adds a cafe
*/
addCafe( { commit, state, dispatch }, data ){

}
One thing to notice about this method's signature is that we have an extra piece in the decoupled data in the first parameter, it's dispatch. What this does is allow us to dispatch actions from within our Vuex module which we will be doing to re-load our Cafes after the cafe has been added. The second parameter, data, will be our form data object.
If you remember in the tutorial /build-api-requests-javascript/ we already added the API request in our Cafes.js API. We will use this very similar to the way we've made other API requests to load the cafes.
In our addCafe() method, in our Vuex module, we should add the following code:
/*
  Adds a cafe
*/
addCafe( { commit, state, dispatch }, data ){
  commit( 'setCafeAddedStatus', 1 );

  CafeAPI.postAddNewCafe( data.name, data.address, data.city, data.state, data.zip )
      .then( function( response ){
        commit( 'setCafeAddedStatus', 2 );
        dispatch( 'loadCafes' );
      })
      .catch( function(){
        commit( 'setCafeAddedStatus', 3 );
      });
}
There are a few things to note: 1. We haven't added the setCafeAddedStatus mutation yet, we will do that next! 2. When successful, we will be setting the cafeAddedStatus to 2 which we can use to display the successful addition of the cafe. 3. When successful, we also dispatch the loadCafes action which will reload the cafes containing the one we just added. 4. On failure, we flag the cafeAddStatus to 3 which we can use to display an error.
A few more things to add our Vuex Module. We need to add the mutation setCafeAddedStatus at the end of our mutations object:
/*
  Set the cafe add status
*/
setCafeAddedStatus( state, status ){
  state.cafeAddStatus = status;
}
This will set the cafeAddStatus accordingly to what we have as a state in our app.
The last thing to add is a getter to get the add state of the cafe:
/*
  Gets the cafe add status
*/
getCafeAddStatus( state ){
  return state.cafeAddStatus;
}
We can now use this to show data updates in our app. Our Vuex module is ready to rock.
Step 4: Review The Laravel Process and Build App
In this tutorial: Add Laravel API End Points - Server Side Up we already built the endpoint to add a cafe. which is POST /api/v1/cafes.We just completed the front end side that calls the appropriate route.
Upon completion, we will have a cafe in the database and this route will return the status.
Let's give it a try!
Make sure you run your npm build dev or production if you want!
So I added Ruby Coffee Roasters in Nelsonville WI. Side note on Ruby Coffee, if you haven't tried them yet, try them! Small town in central Wisconsin that does an amazing subscription service and sells locally and also in Long Beach, CA . Check em out here: Ruby Coffee Roasters | Colorful Coffees roasted in Central Wisconsin, USA.

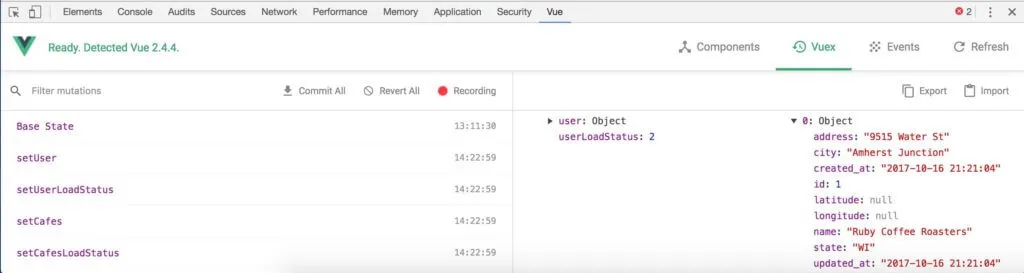
You can see on the response back I got all of the cafes this means that our cafe was added successfully and Vuex called the action to load the cafes again.
I confirmed this by checking out our console and then navigating back to the home page to see it in the list:
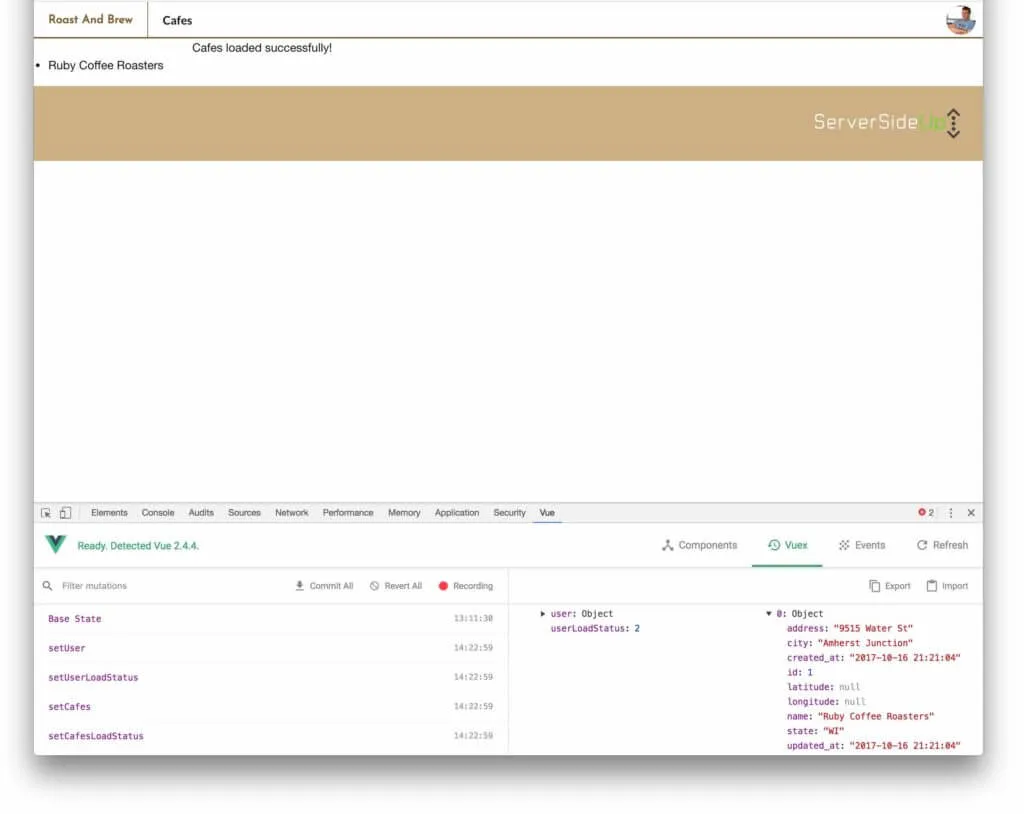
This is exciting! We now have a way to add cafes to our application! And even better, everything automatically stays in sync with Vue and Laravel as it's all reactive with Vuex with minimal API requests!
Conclusion
This is the first of many functionality tutorials. It's awesome to see the application start to come together and personally I can't wait to start using it! Any styles or little designs will be mentioned in tutorials and available to be viewed here: GitHub - serversideup/roastandbrew
The next tutorial we will add a few finishing touches to our API Request and then focus on some awesome enhancements for displaying the cafes.. I'm thinking maps could be helpful!
Want to work together?
Professional developers choose Server Side Up to ship quality applications without surrendering control. Explore our tools and resources or work directly with us.

Join our community
We're a community of 3,000+ members help each other level up our development skills.
 Join our Discord
 Platinum Sponsors

Active Discord Members
We help each other through the challenges and share our knowledge when we learn something cool.
Stars on GitHub
Our community is active and growing.
Newsletter Subscribers
We send periodic updates what we're learning and what new tools are available. No spam. No BS.
Sign up for our newsletter
Be the first to know about our latest releases and product updates.
We're a community empowering product builders with self-hosted tools and open source solutions.