


Customizing and Displaying Tags in Statamic 3


Right away when diving into Statamic 3, I found the need to create some tags for my entries. Grouping entries with tags is extremely important to tying your content together. These groupings allow users to filter your content, find related content, and even see from a quick glance what your content is about. The proper term for these “groupings” is called a “taxonomy”. You’ve used a taxonomy before if you’ve implemented a tag.
Coming from a WordPress background, tags are already created for you out of the box. Right away, you can add them to your posts or pages. When you do a fresh install of Statamic, you don’t have these set up. However, not only are taxonomies really easy to add, there is amazing documentation on how you can easily add a custom taxonomy, along with a helpful video. You can add more than just tags (like categories) with minimal effort. Something that would require a lot of coding in your theme, plugin, or installing a 3rd party plugin.
In this tutorial, I’ll walk you through how to add a field to your tag blueprint. After that, we will display these tags in a few places, a loop of entries and an individual entry. We will also discuss showing the extra blueprint value. Let’s get started!
Prerequisites
The only real prerequisite for this tutorial is that you have a Statamic install. Statamic provides a wonderful tutorial on how to add a taxonomy that you can abstract into a tag with ease. I’d highly recommend following that video. However, below is a quick run through on creating a Tag taxonomy.
Creating your Tag Taxonomy
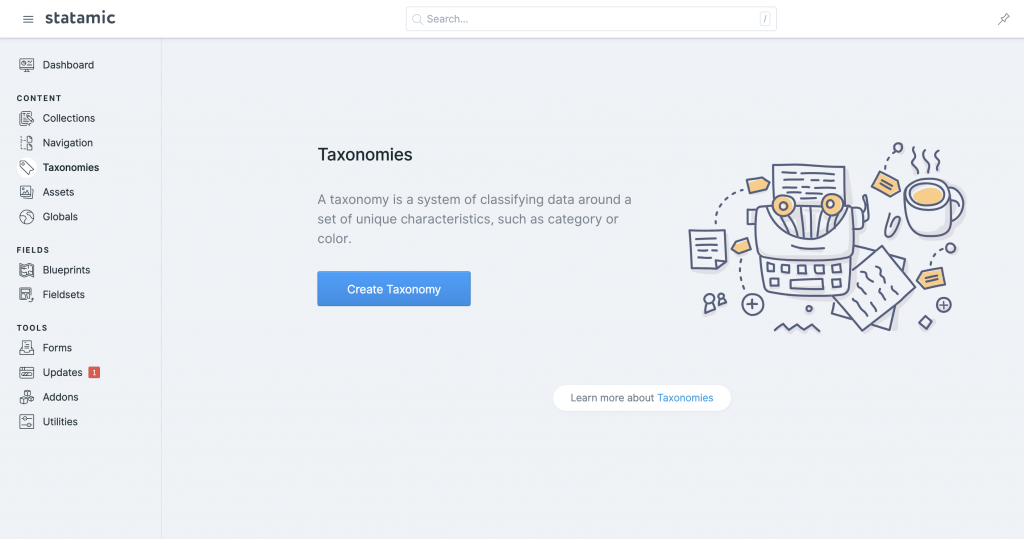
The first thing you need to do is navigate to your control panel within your Statamic install. On the left side there will be a Taxonomies link. Click that and you will see an empty screen like the one below:
Click the “Create Taxonomy” button and fill out the form like the one below:
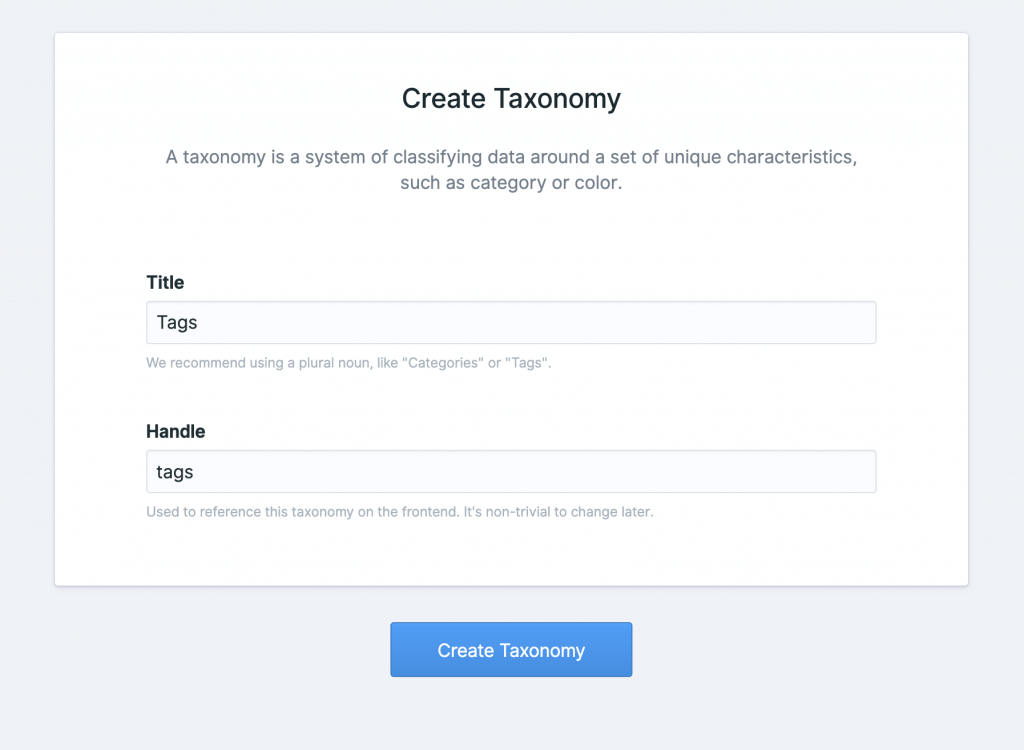
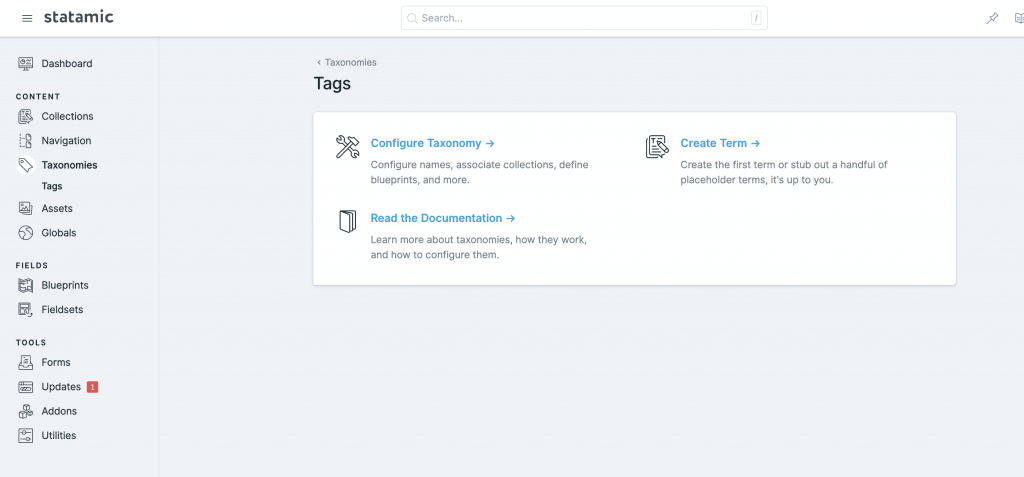
There’s even reference to “Tags” in the sub descriptions. That’s all we need to add! Click “Create Taxonomy” and you will have a way to manage tags with ease! Your next screen will look like:
The last point I want to make, which is also explained in the Statamic 3 docs very well, is that any individual taxonomy (in our case, tags), is called a term. Now that we have our Tags created, we can get started!
Step 1: Bind the tags to the collections you want
I really love this feature of Statamic. It allows you to apply taxonomies to certain collections. If you are new to Statamic 3, check out the overview of collections, entries and blueprints. This will help a ton especially coming from a WordPress background. If you are coming from a WordPress background you might know how difficult creating a custom taxonomy is with WordPress. In Statamic, it’s a simple form. Yea, there’s the step of creating it on fresh install, but the power and flexibility is amazing.
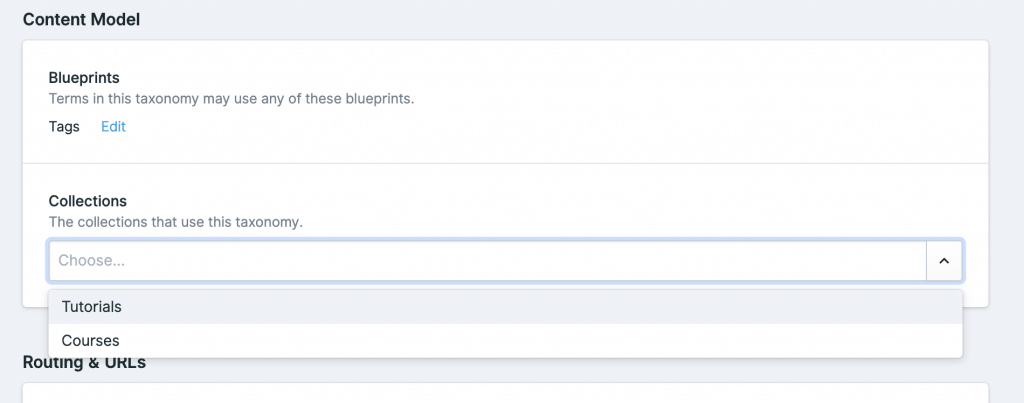
To bind taxonomy/use tags with a collection, you just have to associate the two. In this example, as we re-build Server Side Up on Statamic, we have a Tutorials collection and a Courses collection. Both will use tags. The first step is to click “Configure Taxonomy”:
You will be brought to a slightly larger form with a few options. Next, you will see a content model section. This is where we connect the tags and the collections. All you have to do is select both Tutorials and Courses (or whatever your collections are) and you will be able to apply tags!
It’s super straight forward! Once you save the changes, navigate to one of your individual entries within a collection you selected. On the right hand side you will see a small “Tags” field.
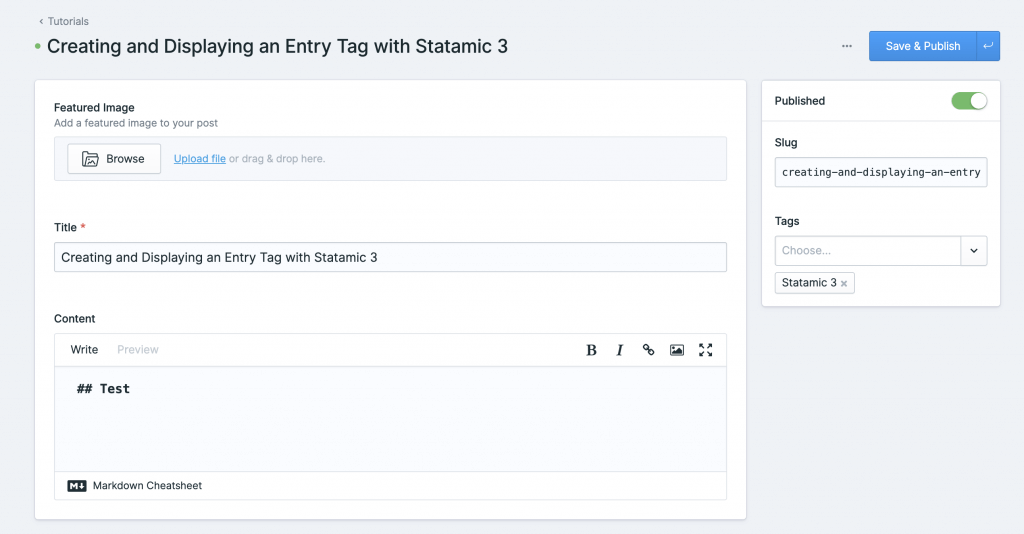
This is where you can select the tags you wish or create new ones by typing! The UI is beautiful and very intuitive. That’s all we have to do to bind our taxonomies to our collections! In the next step, we will extend our Tag to be able to select a color.
Step 2: Add a color field to a tag
I was blown away when I figured out how to do this with Statamic. In WordPress, there were so many hooks and moving parts to add additional meta data to a tag. In Statamic, it’s literally a few clicks.
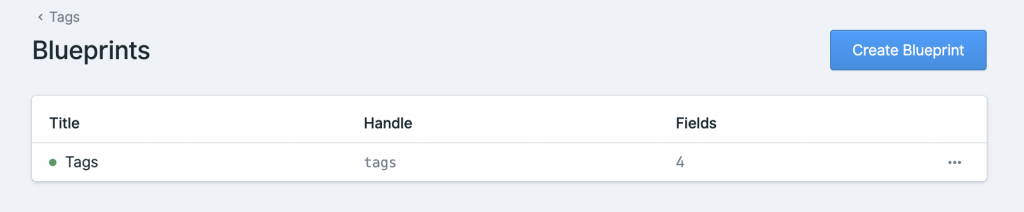
First, navigate to the Tags taxonomy in the control panel and click “Edit Blueprints”:

You will be brought to a page that lists out all of your taxonomies. On this page, click “Tags”:
Now you will be brought to your Tags taxonomy blueprint builder. In here is where you can adjust the Blueprint for your Tag similar to that of a collection. This is absolutely amazing!
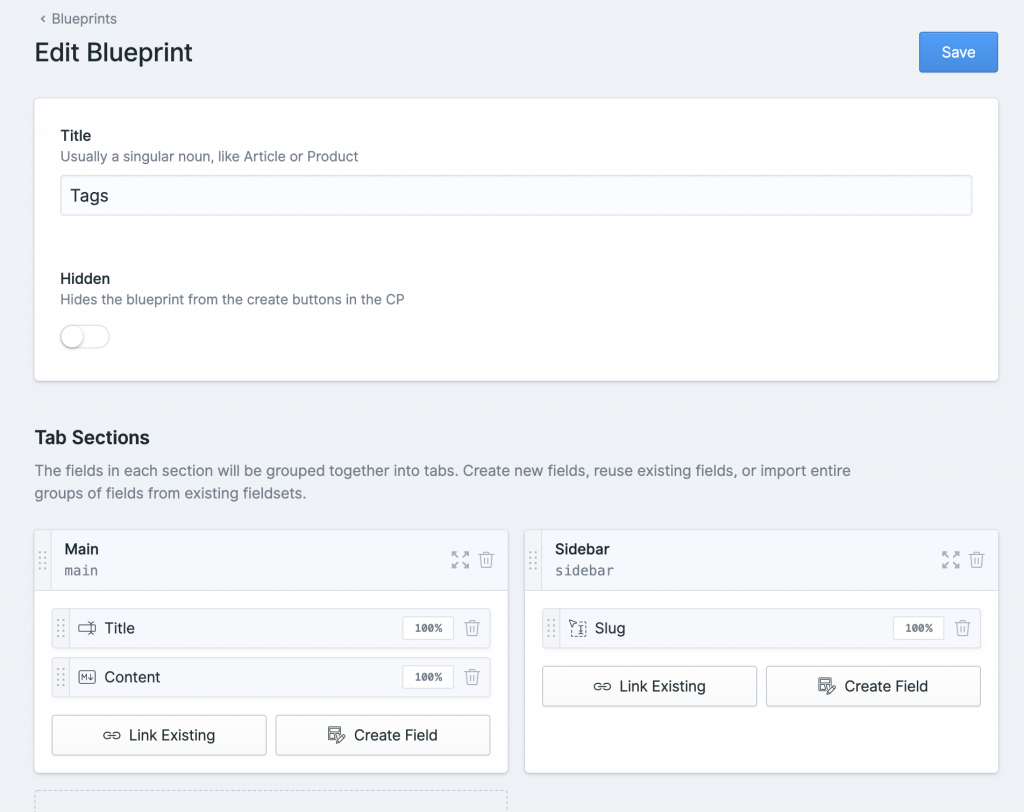
In the sidebar, I clicked “Create Field” to add our color field. On the very bottom of the pop out there’s a field called “Color”. You guessed it, select that field. From there, you can adjust the “Display” and “Handle” for your field. I adjusted mine to just be “Color”.
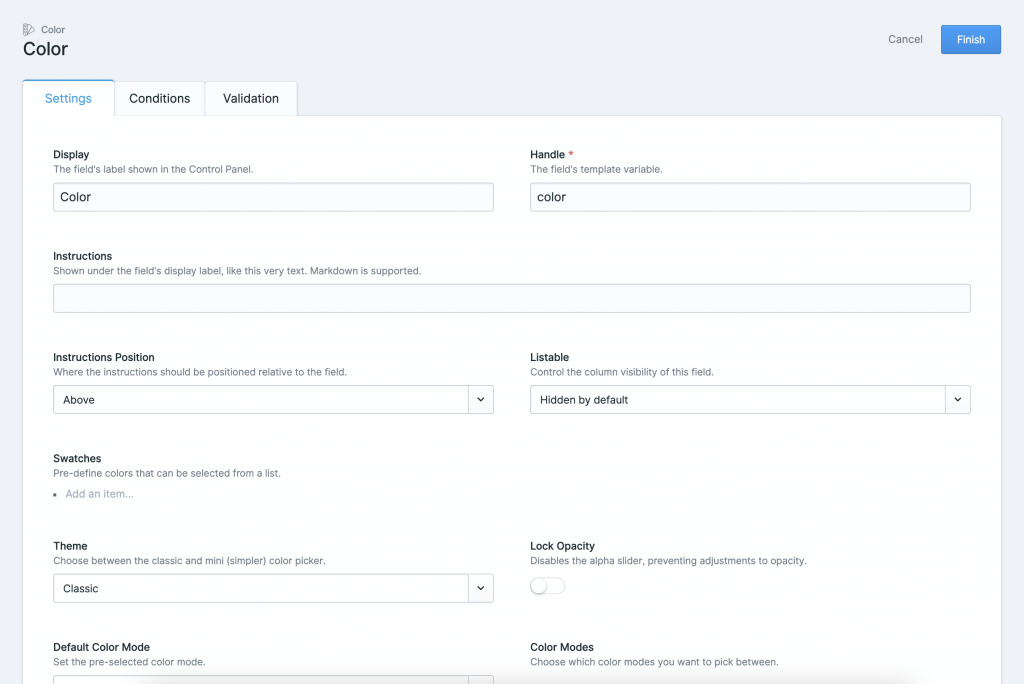
If you look at the form, you can find certain color specific options like HEXA, RGBA, etc. which allow you to select the format you want the user to able to select their color. Not only do you not have to extend the meta data on the taxonomy through a ton of code and hooks. But out of the box, you get a color picker already to go so you don’t have to install any 3rd party libraries either! When you are done configuring, press “Finish” in the top right.
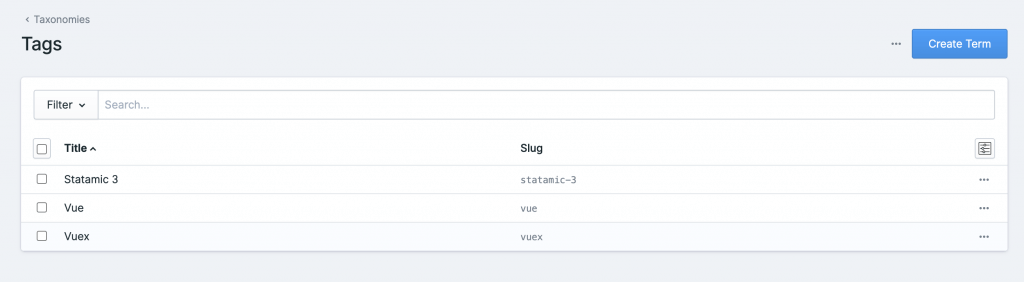
Your color field will be added to your Sidebar. Now press “Save” on your Blueprint and head back to your Tags taxonomy. Once you are back on your Tags Taxonomy page, select an individual term from the list:
Once you click your term, you should be able to see the few fields the term comes with by default. You should also see a “Color” field on the sidebar! Click the color picker and you can select or enter a color for your taxonomy.
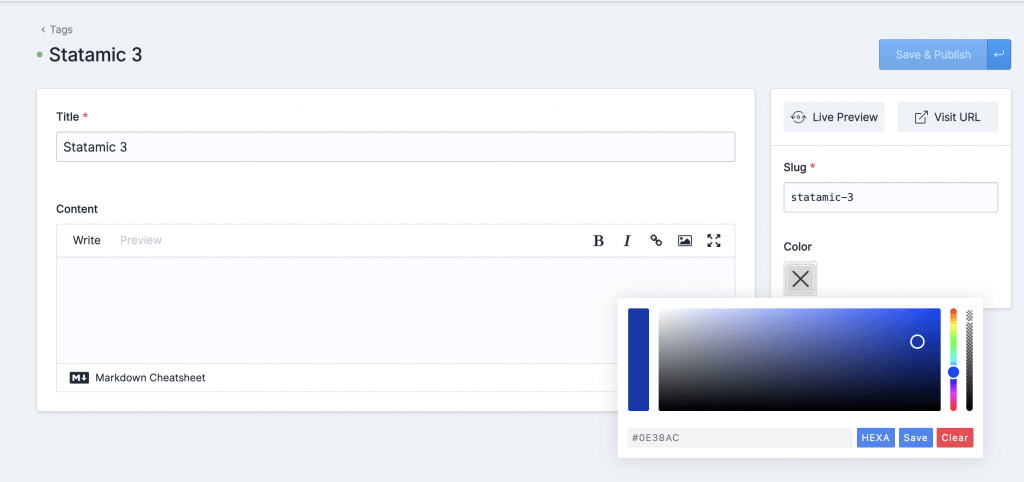
Once you’ve selected your color, just click “Save & Publish” in the top right and your tag will have a color! Now all we have to do is display this color in our view template. The next sections both have a little bit of template coding so consider this a fair warning!
Step 3: Display the tags in a loop
So now that we have our Tags created and we added an extra color field, let’s show them in a loop. If you look at our home page, you will see the 3 newest courses we have on the site:
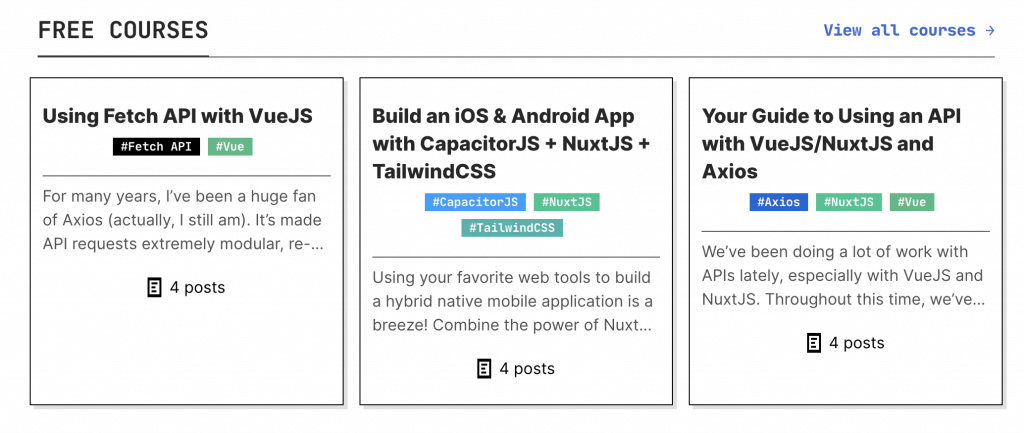
Below the title, we display the tags for the courses and highlight them with a colored background. That’s what we want to do in our Statamic site. I’ll show the basic breakdown on how to do this without the CSS classes so it’s a little more readable.
First, open up the file that displays the view you wish to add these to. In our example, this would be the index.antlers.html file that we’d build in response to the homepage route /. In that file, I’d first start by building a loop over my courses like this:
{{ collection from="courses" }}

{{ /collection }}
Within that loop, you will have access to the scope of each individual course entry. What that means is you can access variables such as title or content. In our case, we can also access tags. If you navigate to the /content/collections/{your-collection-name}/{your-entry} and look at the .md file you will see a bunch of front-matter:
---
id: {ID}
blueprint: courses
title: 'Beginning Statamic: Concepts, Recipes, Tutorials'
tutorials:
  - {TUT_ID_1}
updated_by: 1
updated_at: 1647304558
tags:
  - statamic-3
  - laravel
---
This is an example of some of the variables you can reference within the scope of the loop. You can see tags is one of them.
Within your loop, add a sub loop to iterate over the tags:
{{ collection from="courses" }}
    {{ tags }}
        {{ title }} {{ color }}
    {{ /tags }}
{{ /collection }}
Now, let’s break that down a little bit. First, we are looping over our courses collection and grabbing all of the entries. In the future we will scope this down to the 3 newest, but for now, we will skip that. Next, we add a sub loop with {{ tags }}. This loops over all of the tags present on the current course entry within the loop.
Within the {{ tags }} sub loop, we have access to the variable for the tag itself! These look very familiar to the variables from the front matter for the entry and it should! Even tags have front matter and are stored in .yaml files in your /content/taxonomies/tags directory:
title: 'Statamic 3'
color: '#5672C2'
updated_by: 1
updated_at: 1647304005
Any of those variables are referenced by their key in the antlers template. If we were to apply the background color to a tag, we’d add the following to our template:
{{ collection from="courses" }}
    Course Title: {{ title }}
    {{ tags }}
        <span style="background-color: {{ color }}">{{ title }}</span>
    {{ /tags }}
{{ /collection }}
That’s really all there is to it! From there you can expand your taxonomy with more fields, create reusable partials for a course card (recommended and will discuss in a later tutorial), and extend anywhere.
Now that we’ve walked through how to display tags in a loop. Let’s touch real quick on how to display tags on the top of an individual entry.
Step 4: Display tags on individual entry template
This is the quickest step of all. You know how in the loop, we had access to the scope of the individual entry in Step 3? Well, once you edit the individual entry page, you already have that scope. Wherever you wish to add your tags display, simply add the following:
{{ tags }}
    <span style="background-color: {{ color }}">{{ title }}</span>
{{ /tags }}
That’s it! I’d recommend cleaning up the design to match your style of course. That’s how you display tags on an individual entry page.
Conclusion
In all honesty, I felt like I was missing something when I connected all of the dots. Statamic is so intuitive. Coming from a WordPress background where it’s extremely flexible, but you have to know a ton of code, this functionality is amazing.
I’m definitely going to continue documenting my Statamic processes as we re-build Server Side Up. Let me know if you have any questions or want to see any tutorials added! Feel free to reach out on our community or on Twitter!


 Become a Sponsor